CoreView provides two methods for generating “Custom reports”:
- By saving and applying filters to an existing report, and having it show up in your “Custom reports.”
- By using the “Create new custom report” functionality, as explained below.
Create a custom report
The “Create new custom report” functionality allows you to create new custom reports, which will appear in your custom reports list. Follow this step-by-step guide to create one.
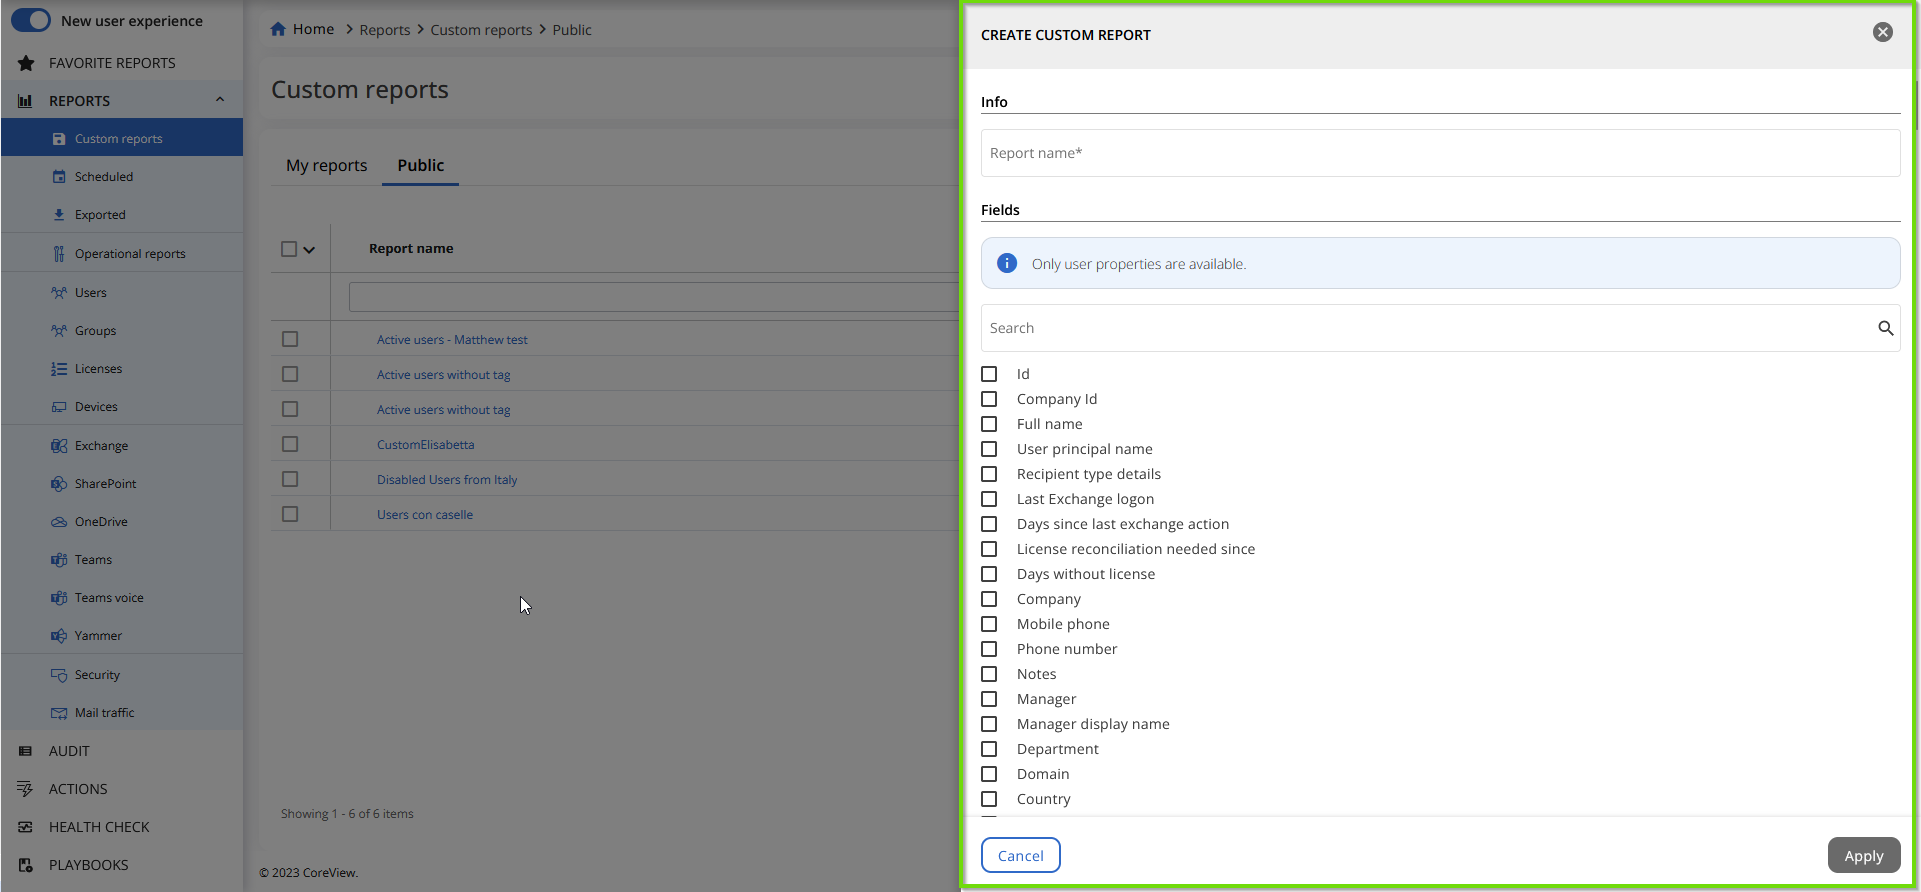
To create a new custom report, click on “Create new custom report” at the far right of the screen, and a new panel will pop up:

Now, you must fill in the fields, as shown in the picture below.
Here, you can:
- Insert the “Report name” in the “Info” field (mandatory task, as indicated by the asterisk).
- Select the appropriate items that are necessary for your report by checking them from the list.
Then, click on the “Apply” button to successfully complete the operation.
You can save this custom report from the “Action” menu, by selecting “Save custom report”.

