CoreView relies on Graph for executing management actions. From the Graph management panel, you can authorize the use of the Microsoft Graph module. By doing this, you will grant some permissions that allow CoreView to execute certain actions.
However, the default permissions assigned to the Graph application registered within CoreView may not be sufficient to execute some actions. For security reasons, CoreView does not assign roles on your behalf. Therefore, based on your operational scenario, you might need to assign additional roles to the Graph Management app.
To ensure seamless operation, please refer to the table in Microsoft's documentation to find out which roles are required.
A scenario: sensitive actions
A classic scenario involves actions that can be used to change sensitive user data.
These actions may include resetting a user's password or updating the business phone number (businessPhones), the mobile phone number (mobilePhone), or other email addresses for the user (otherMails).
In the Update user article, Microsoft documentation itself states that:
In app-only scenarios, in addition to Microsoft Graph permissions, the app must be assigned a higher privileged administrator role as indicated in Who can perform sensitive actions.
The following properties cannot be updated by an app with only application permissions: aboutMe , birthday , employeeHireDate , interests , mySite , pastProjects , responsibilities , schools , and skills .'
In the article Working with users in Microsoft Graph, Microsoft documentation also specifies in the article which actions against the user object are considered sensitive and who can perform sensitive actions. You can refer to these last two tables to know which roles to assign to the Graph application in CoreView to perform the desired actions.
Consider the example of the management action “Manage Password”. Click on the accordion below to view the example:
Show the example
One critical management action affected by this condition is “Manage Password”, which allows for the resetting of passwords for both non-admin users and users with admin roles.
To enable the “Manage password” management action, you will need to assign one or more roles to the Graph application:
Manage passwords of non-admin users only
User Administrator This role does not allow for the modification of password profiles of users with admin roles. Assign this role if you intend to change passwords for non-admin user.
Manage passwords of admin and non-admin users
Privileged Authentication AdministratorWith this role, you can also change the passwords of users with admin roles. Assign this role if you need to change passwords for both admin and non-admin users.
Advanced Manager password rotation
Please note that the roles User Administrator and Privileged Authentication Administrator
are also required for the password rotation of the Advanced Management User (4ward365.admin@domain) and the Service Accounts (coreview.reports1@domain).
Assigning roles to the Graph Application
If you need to assign one or more roles to the Graph application in CoreView, the following guide provides steps for role assignment in the Microsoft Entra admin center.
For additional information, you can refer to the Assign Microsoft Entra roles to users article in Microsoft's official documentation.
Please note that procedures may vary with Microsoft updates or your configuration. If you encounter any doubts or issues, it's best to refer directly to Microsoft's documentation.
As an example, for the guide we will continue with the “Manage Password” scenario, assigning the necessary roles to the Graph application.
Step 1: copy the Client ID
Copy the Client ID of the application you have registered with CoreView.
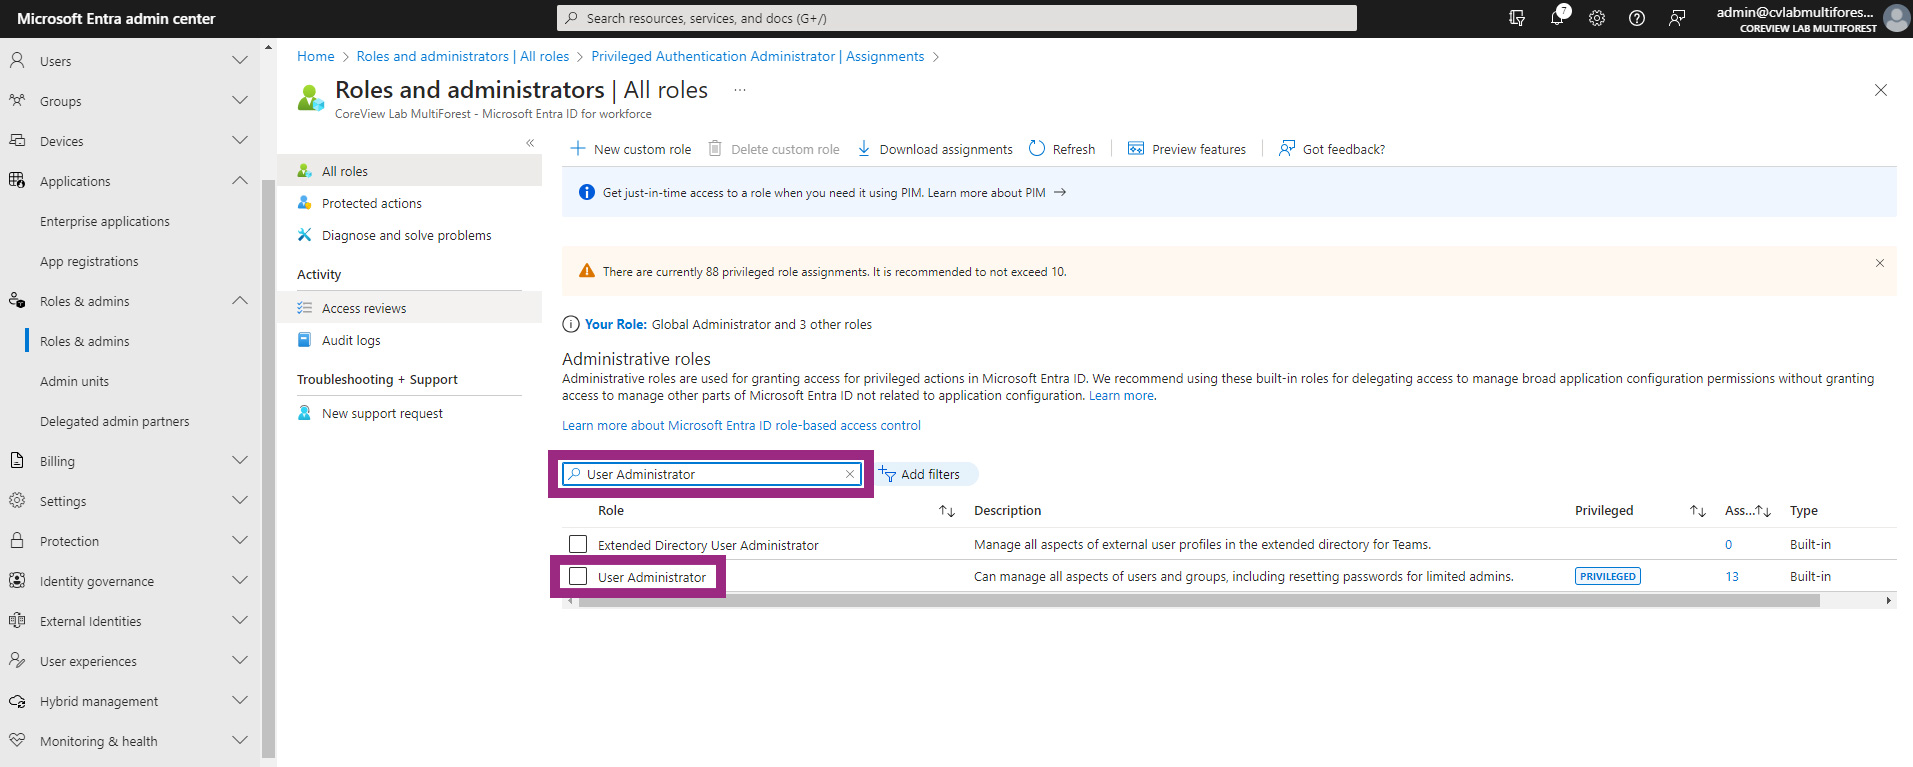
Step 2: access “Roles & admins” and find the role
- Visit the Microsoft Entra admin center.
- In the left-hand menu, expand the “Identity” section.
- Click on “Roles & admins”.
- Use the search engine to look for the required role:
User admin rolePrivileged Authentication Administrator
- Double click on the desired “Role” from the search results.

Step 3: assign the role to the Graph application
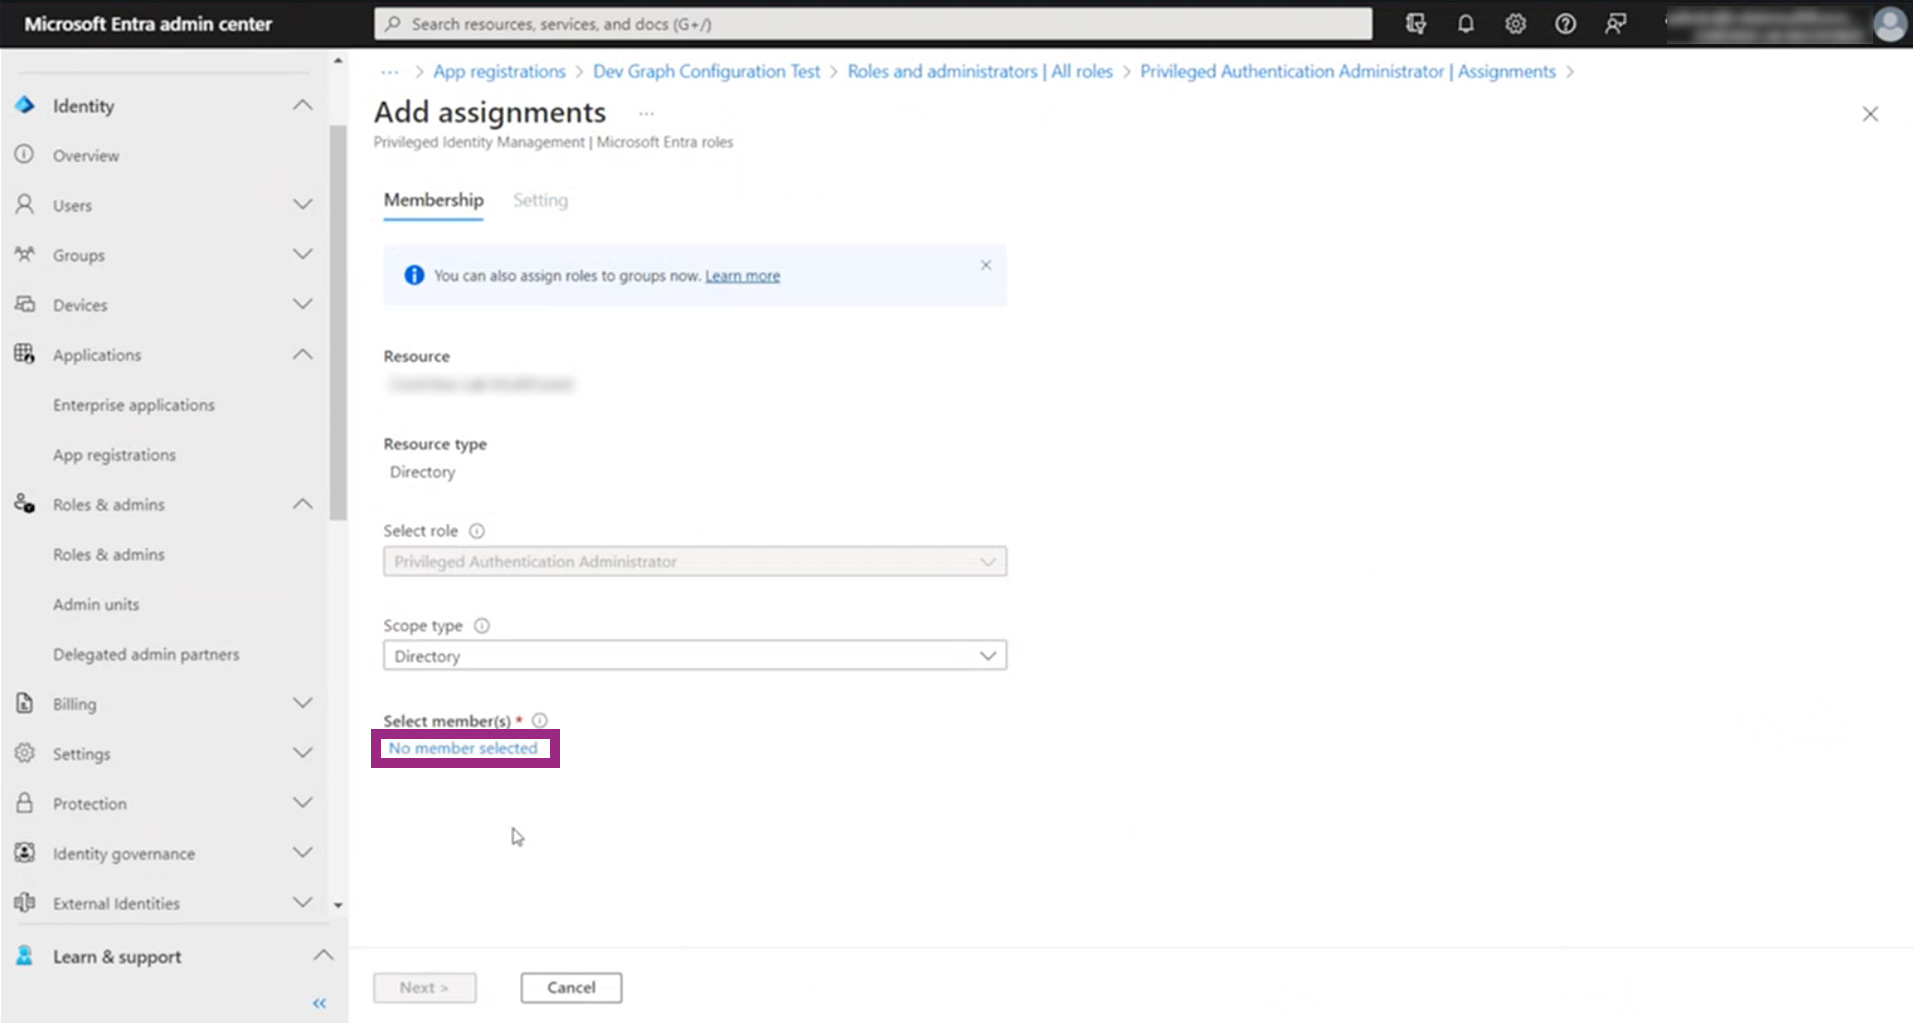
- From the role detail page click on “Add assignments“.

- Under “Select member(s)”, click the link indicating the number of members or “No member selected”.

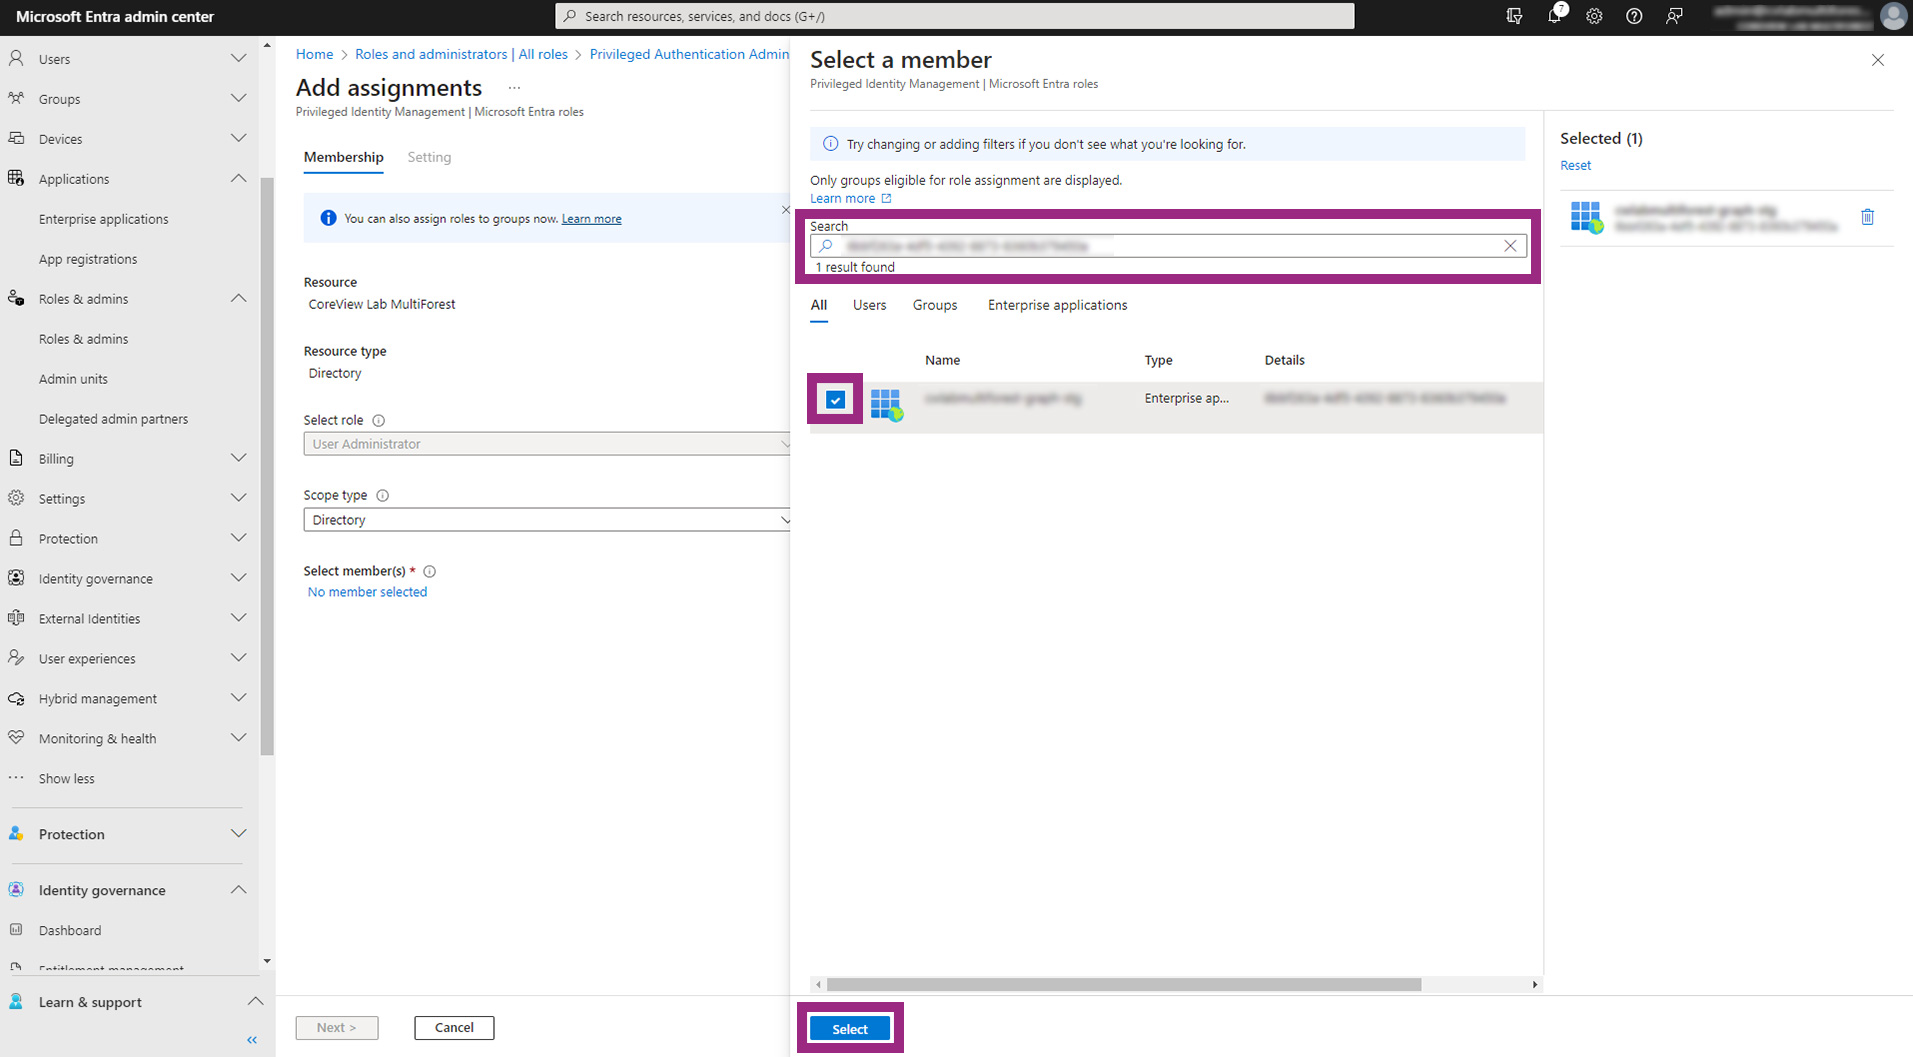
- A pop-up titled “Select a member” will appear.
- Paste the previously copied Client ID into the search engine.
- Check the box next to the registered app in the search results.
- Click the “Select” button.

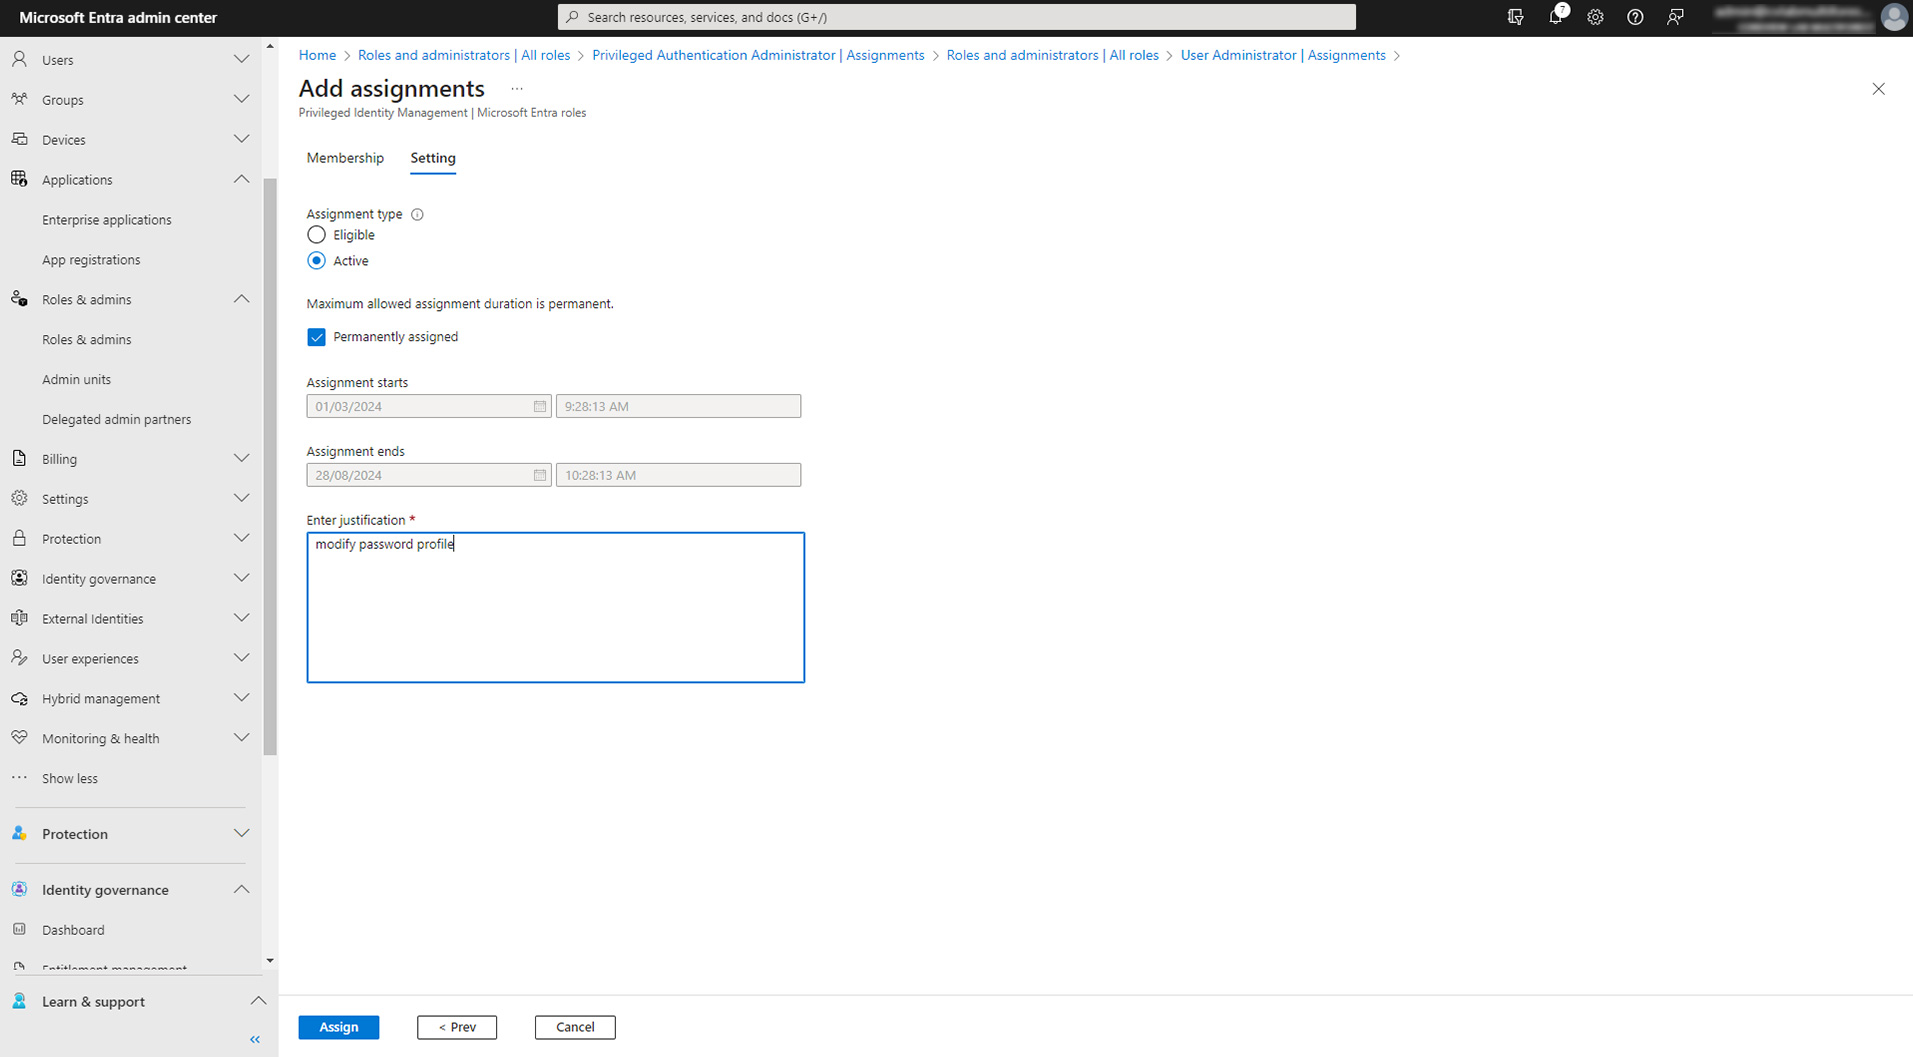
- Fill in the fields.

Step 4: check
The application you selected should now appear in the “Assignments” results for that role.

With these steps completed, the Graph application will have the necessary roles and permissions, and you can use the “Manage password” management action to reset passwords as required.
