Workflows are not available in the Essentials solution.
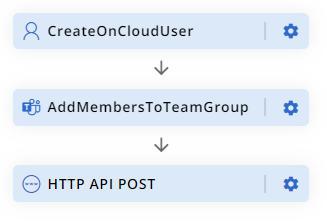
In this guide, we'll show you how to set up a Workflow that automatically greets new users with a message on a specific Teams channel. To do this, we'll need to add three actions:
- CreateOnCloudUser: this action creates a new user.
- AddMemberToTeamGroup: this adds the user to a specified Teams group.
- HTTP API POST: this sends a greeting message to a Teams channel.
Prerequisites
Before we start, make sure you have the following:
- An app token for Teams. This is necessary to send messages.
- The ID of the Teams Group and the Teams Channel where you want to send the greeting message.
- The message you want to send. Microsoft offers a variety of message formats to choose from.
You can find the Teams Groups and Channel IDs on the CoreView portal under Reports.
Setting up the Workflow
Execution inputs
We'll begin by configuring the execution inputs. These inputs will be provided by the person running the Workflow.
User creation
To create a user, we will use their first and last name to generate a username and assign a temporary password for their initial login.
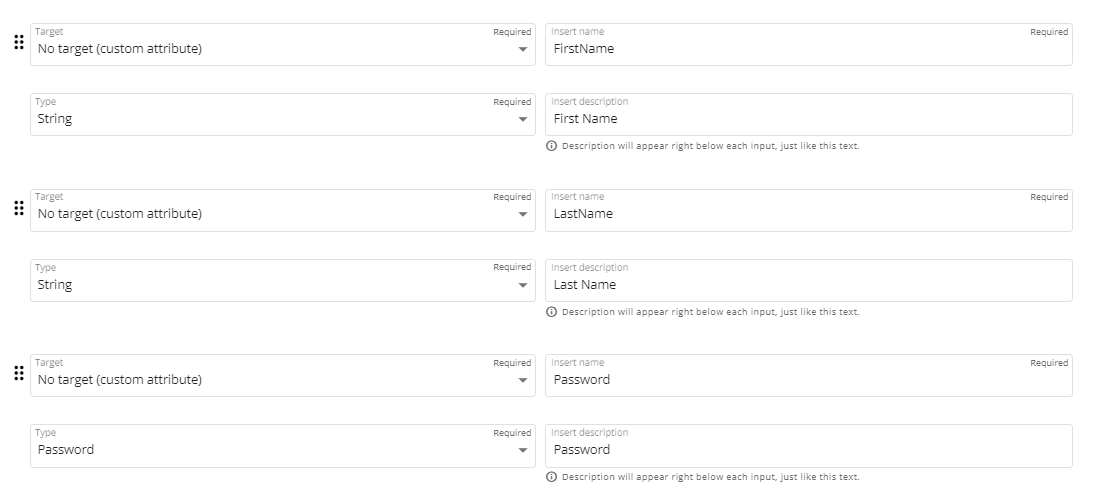
Ensure that the Password field is set to the “Password” type. This will cause the portal to hide the password in Workflow visualizations and provide an option to automatically generate a password when executing the Workflow.
Teams information
To integrate a user into the desired Workflow, you need:
- Group ID: For adding the user to a specific group.

- Channel ID and Authorization Token: Required for sending the message.

Creating a user
Step 1: Add a new action
Go to the "User" category and select the "Create user" action.

Step 2: Fill out the form
The Settings form will appear. For this tutorial, we will fill in only the required fields. Optional fields include location, job title, manager, etc.

Step 3: Map execution inputs
Include essential details as follows:
- Display Name: combine the first and last name inputs with a space.
- Password: assign a password.
-
User Principal Name (UPN): Combine the username and domain.
- Username: formed by joining the first and last name inputs with a dot.
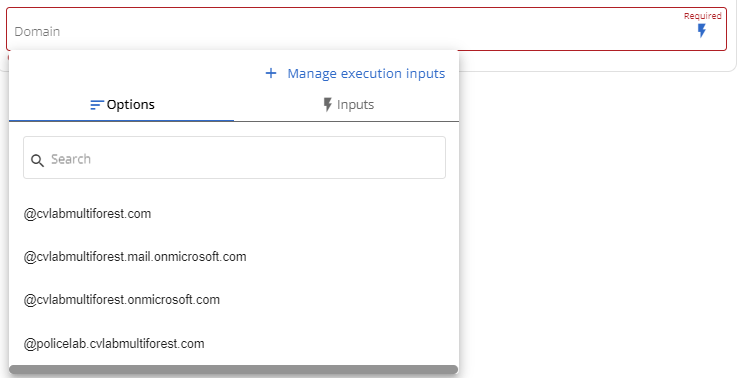
- Domain: select from a pre-populated list based on your tenant.
Adding a user to a Teams group
- Select action: Choose "Add members to Teams groups" under the "Teams" category.

-
Define settings:
- Group ID: use the execution input previously set.
- Role: assign the user as a member (or owner if preferred).
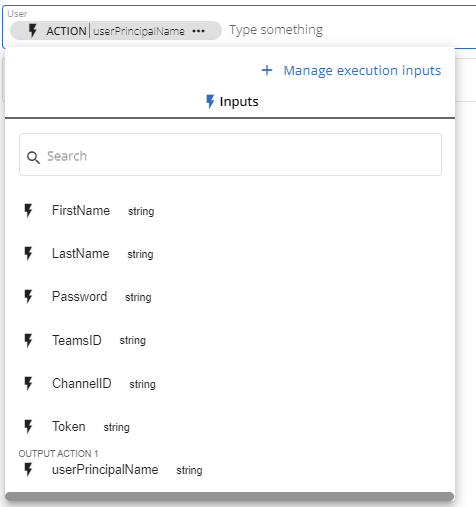
- User: use the userPrincipalName from the output of the previous action.
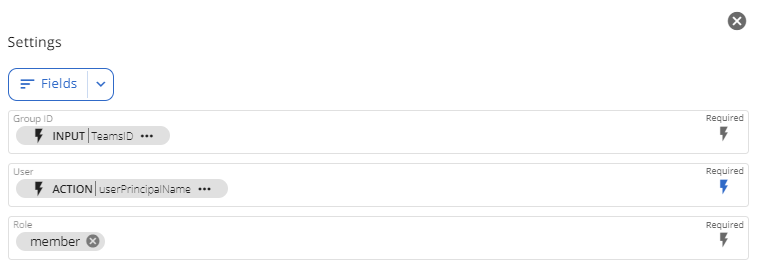
"Output actions" are the results of preceding actions. They enable the chaining of various actions by utilizing the input from one action to inform the next.
Sending a Teams message
- Add HTTP POST action: Select the "HTTP Integrations" category, then the "HTTP API POST" action.

- Configure the following required settings:
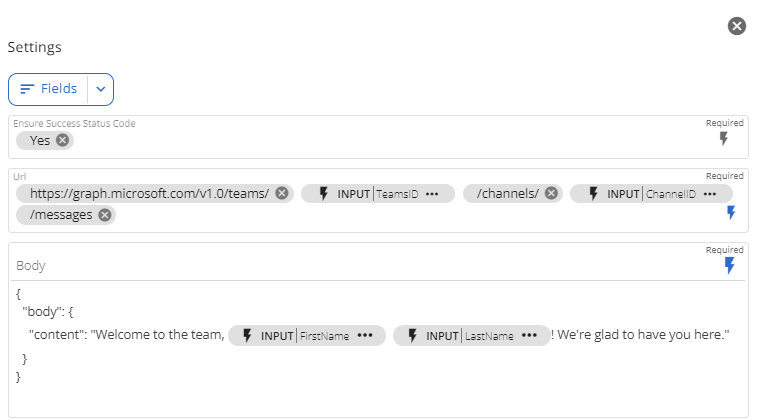
Ensure Success Status Code
You may want to ensure your request was successful, and if not, set the action to fail. You can set this behavior by having the "Ensure Sucess Status Code" with the value "yes".
Note: Success codes are typically in the 200-299 range (e.g., 200 for success, 201 for created).
URL
To send a message to a Teams channel, formulate the URL as follows:
POST /teams/{team-id}/channels/{channel-id}/messages
To achieve this compose the two execution inputs with the desired URL string:
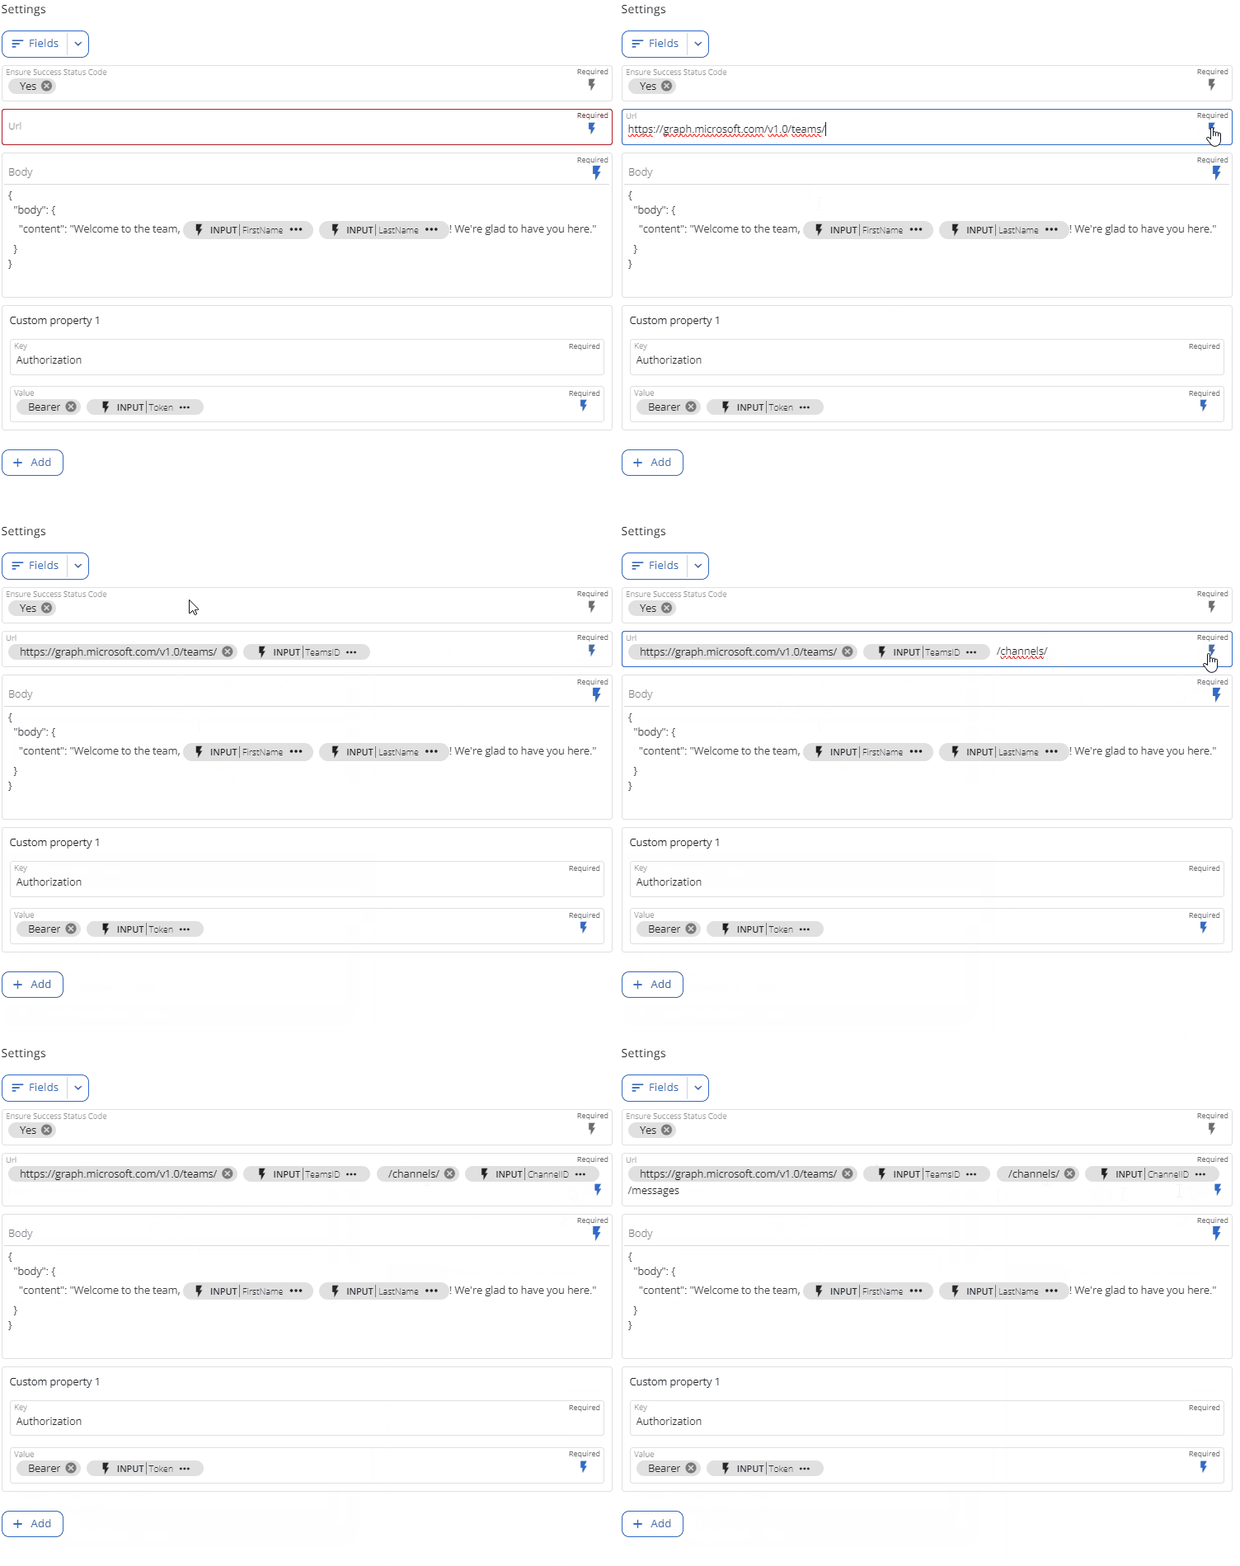
For more information on the URL, please refer to Microsoft documentation.
Body
In this tutorial, we used the following:
{
  "body": {
    "content": "Welcome to the team [User Name]! We're glad to have you here.",
  }
}
Replace [User Name] with the new user's name by integrating the execution inputs:

The body must be a valid JSON, this will be ensured by the form component, which will validate the text and inform if the same is invalid.
If the JSON is invalid the following information will be present at the bottom of the component:

For more information on the body, please refer to Microsoft documentation.
Header
Inform a valid authorization token on the header of your message. The Header is an optional value that can be added to the form by selecting it under the “Fields” menu.
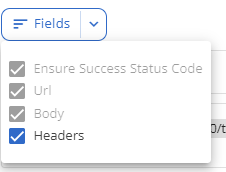
The key must be “Authorization” and the value is composed of the string "Bearer" and our execution input "token".

For more information, please refer to Microsoft Graph documentation.
Executing the Workflow
- After configuring the actions, save or publish your Workflow.
- Operators running the Workflow will input the necessary execution details at the start.
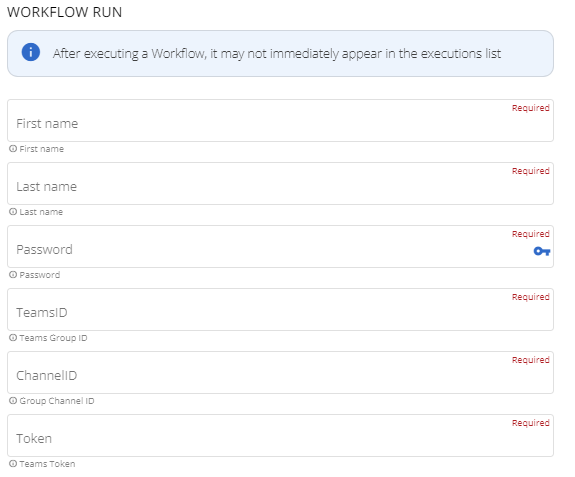
Note: Find Teams Groups and Channel IDs in the CoreView portal under Reports. Generate the necessary token by registering an application with Microsoft. For more details, consult the official Microsoft documentation.
