The management session must be active when performing Playbook remediation actions, management actions, custom actions, and Workflows. More information are provided in the Introduction to management sessions article in our product manual.
Two configuration methods are available to initialize the CoreView management session:
- Creating a Management Service Account is recommended, as this option enhances security by eliminating the need to distribute Global Admin credentials to delegated operators.
- Using Microsoft Global Admin credentials; however, this method necessitates disabling MFA, which might not be suitable for every scenario.
This article will guide you through both procedures to activate the CoreView management session by choosing one of the two options.
Option 1: Create a Management Service Account (recommended)
Create a Management Service Account to delegate management action execution to other operators without providing them with the credentials for the Admin Center.
Creating a Management Service Account is the preferred method for enabling a management session in CoreView.
Follow these steps to create a Management Service Account for the first time.
Step 1: preparing for the activity
- policies
- policies
Check the policy
To resolve this problem, you need to check what is the policy that is currently blocking the access of our management account by using the what if analysis on 4ward365.admin/coreview.admin account
Configure allowed IPs
Then, please follow a simple manual procedure to configure allowed IPs for our management user (4ward365.admin/coreview.admin) and MFA will be mandatory outside of it.
Note: in case the policy is enabled, you won't see that the MFA is enabled for the users from the Azure Active Directory Admin center.

To enable the management sessions follow the steps below.
Enable the management session
Step 1: Select the “Use management service account” option.
- Navigate to the “Management OFF” tab at the top of the screen.
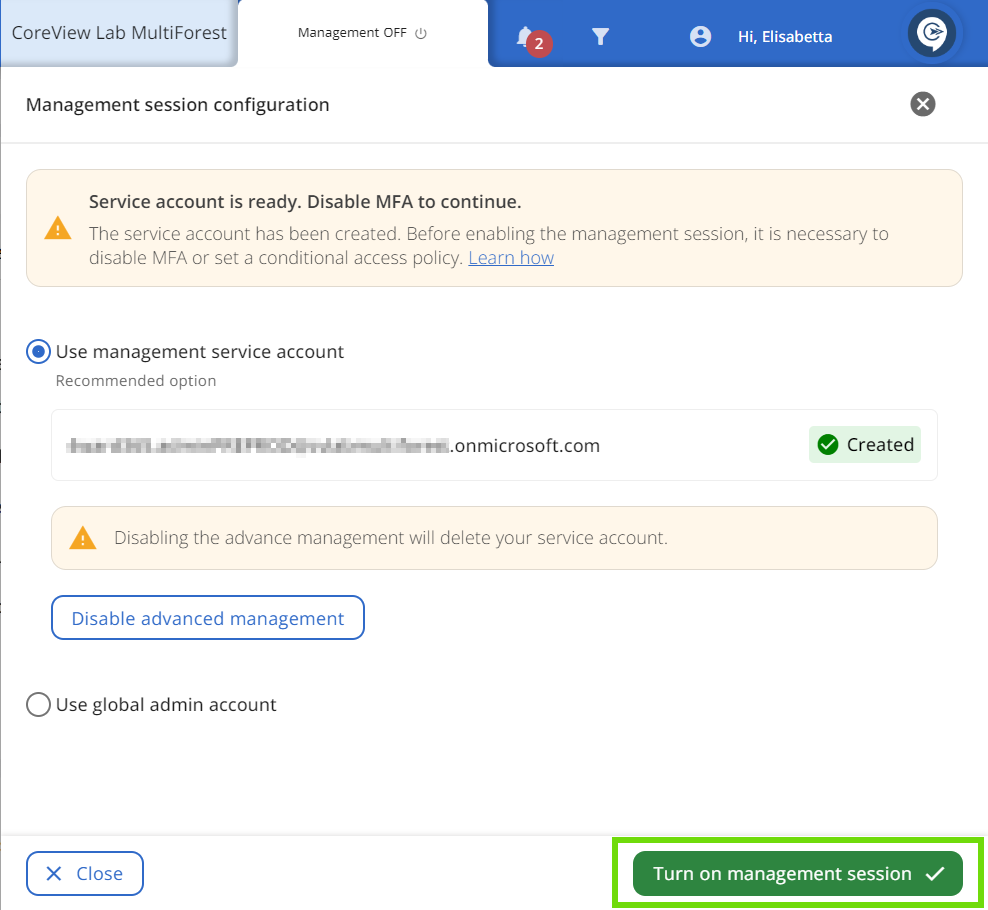
- Choose the “Use management service account” option.
- Click the blue “Create service account” button to begin the process. You'll see a loading screen, and the process may take a few minutes.
Step 2a: Turn on the management session
- After the process finishes, your management service account will be shown as created.
- Ensure that the MFA for the service account is disabled or a conditional access policy is in place. This step is essential for the process to succeed.
- Once confirmed, click the green “Turn on management session” button.

Step 2b: Troubleshooting service account creation
If the message “CoreView doesn't have permission to create a service account on your tenant” appears, click the “Retry service account creation” blue button below to attempt again. Should the issue persist, contact the CoreView Support team for assistance.

Step 3: Auto-enable management session
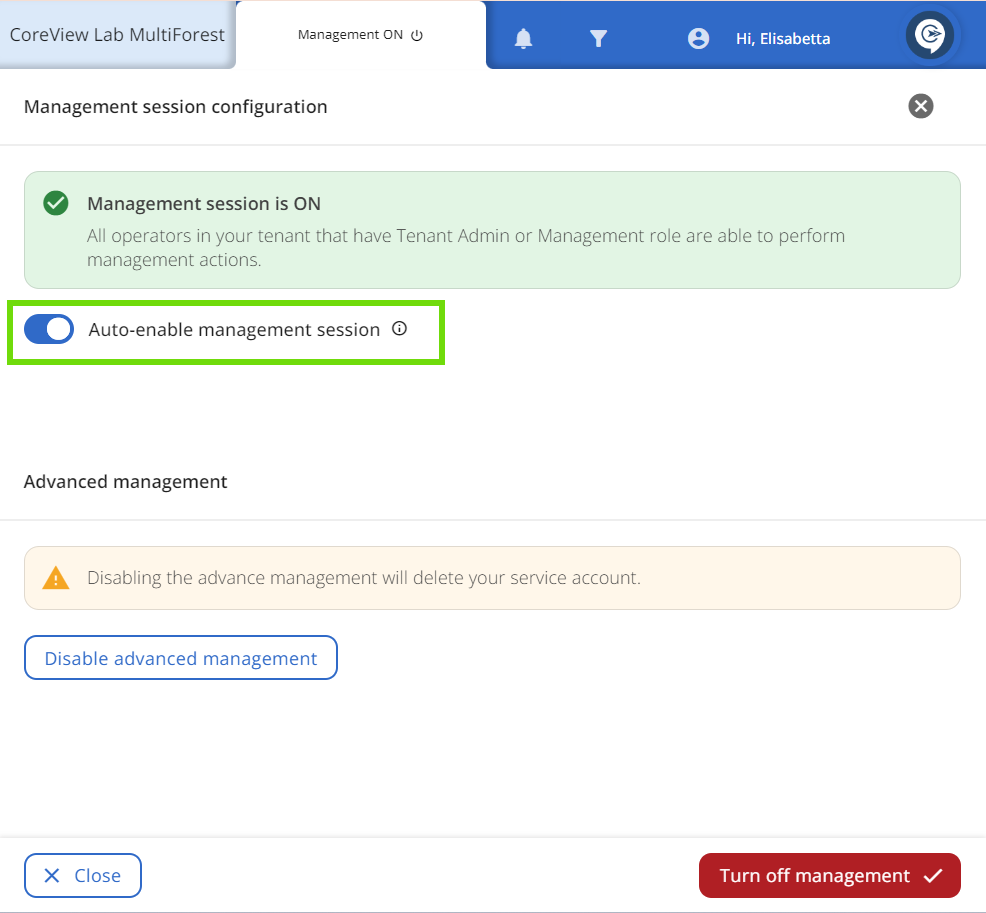
Turn on the “Auto-enable management session” toggle to allow the management session to activate automatically whenever operators perform management actions, regardless of their current management status.

You are now set to carry out management actions, custom actions, and workflows. To deactivate the management session, click the red “Turn off management session” button.
Be aware that selecting “Disable advance management” will delete your management service account.
Option 2: Use Microsoft Global Admin credentials with MFA disabled
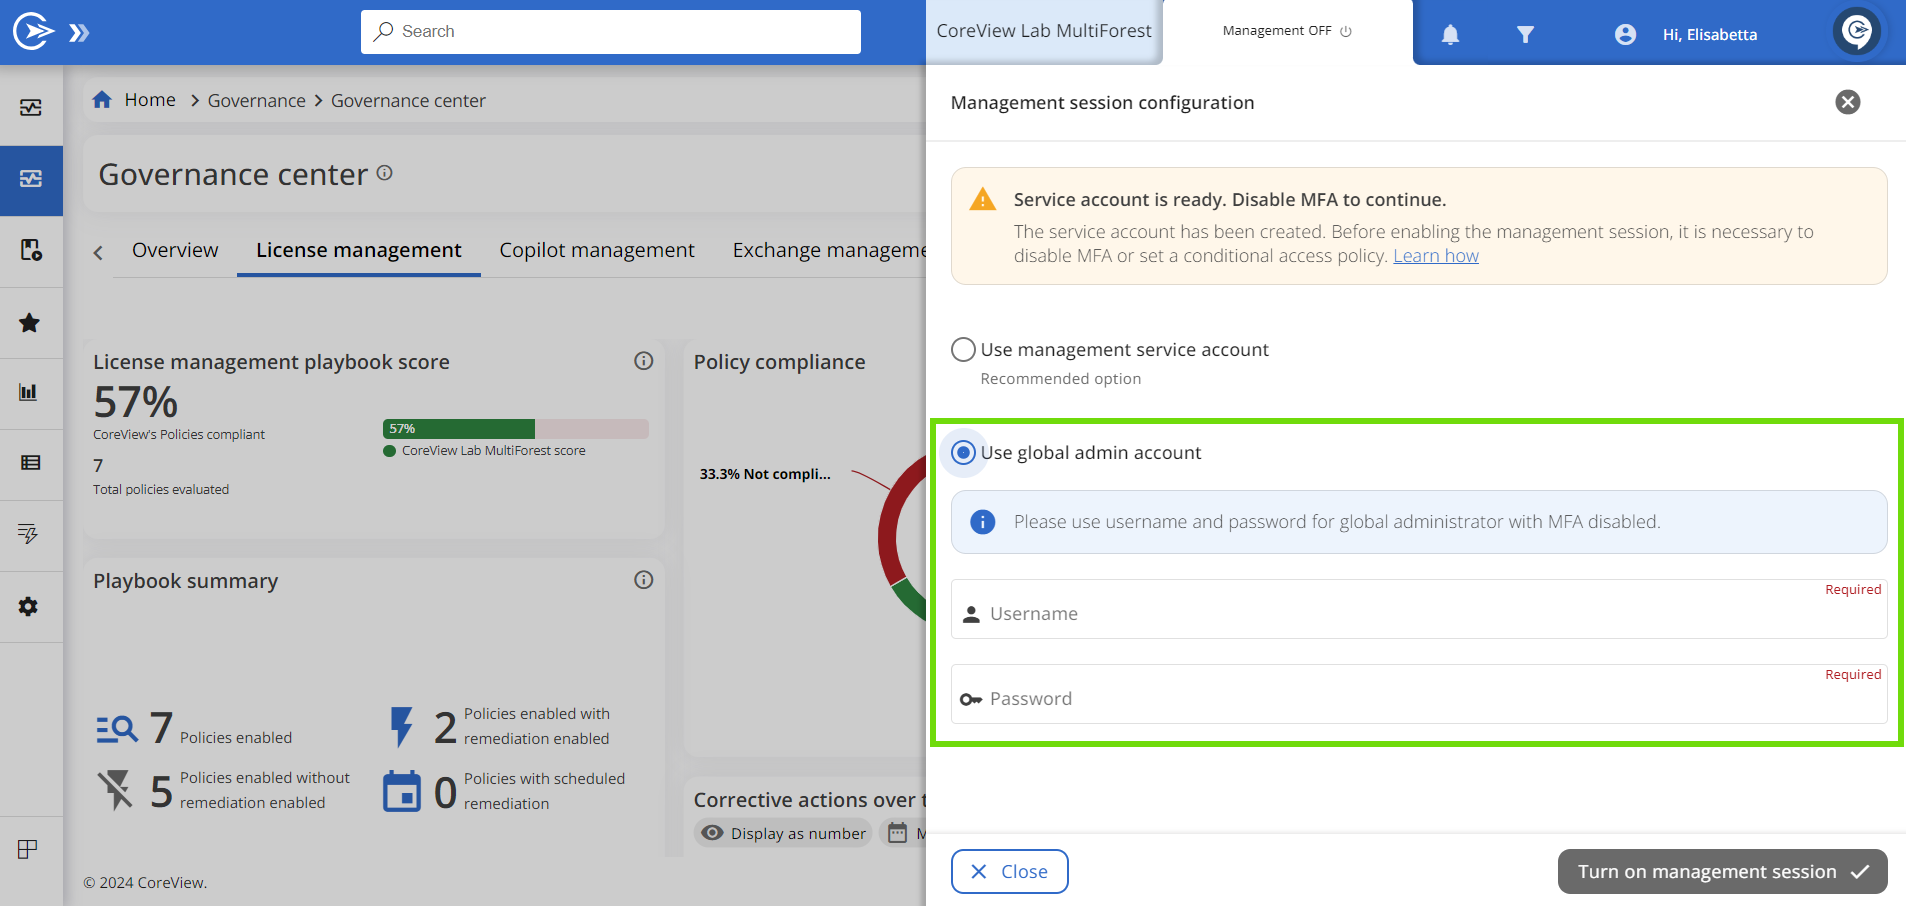
To activate the management session for the first time with a Microsoft Global Admin account and MFA disabled, follow these steps:
- Enter the credentials of a Global Admin without Multi-Factor Authentication (MFA) enabled.
- Select the green “Turn on management session” button.

Enabling the management session can require some time, normally a few minutes. Once it is enabled, the header will show the “Management ON” message. Clicking on that, operators can view further details and turn it off.


