The article outlines steps to download and use the CoreView Diagnostic Tool via Docker for testing CoreView Hybrid Connector environments. It covers login, image pulling, and running diagnostics. Moreover, it provides PowerShell commands for connectivity and performance tests, with instructions for saving results and troubleshooting.
Login and pull
Login
To download the latest container image of the CoreView Diagnostic Tool, please open a PowerShell session with administrative rights and execute the following commands:
docker login -u 62f8c18f-5326-430e-ac17-2fdd8f0c280e -p {SecretKey} cvhybridtool.azurecr.ioIn the PowerShell script presented above, the secret key must be inserted in place of {SecretKey}.
To obtain the secret key, contact our Support team, who will provide it securely.
Pull
Once you've completed the previous steps, you should proceed to download the Docker Diagnostic Tool image.
2019 version
For the 2019 version, please execute the following command:
docker pull cvhybridtool.azurecr.io/cvdiagnostictool:20192022 version
For the 2022 version, please execute the following command:
docker pull cvhybridtool.azurecr.io/cvdiagnostictool:2022Do not use PowerShell ISE for the CoreView Diagnostic Tool, as it is incompatible. For optimal performance of the command-line tool, we recommend maximizing your PowerShell window to full screen.

Run
2019 version
If you previously downloaded the 2019 version of the CoreView Diagnostic Tool, please run the following command instead:
docker run -v c:\temp:c:\temp --rm -it cvhybridtool.azurecr.io/cvdiagnostictool:2019 2022 version
If you previously downloaded the 2022 version of the CoreView Diagnostic Tool, please run the following command instead:
docker run -v c:\temp:c:\temp --rm -it cvhybridtool.azurecr.io/cvdiagnostictool:2022Step 1: select the data center
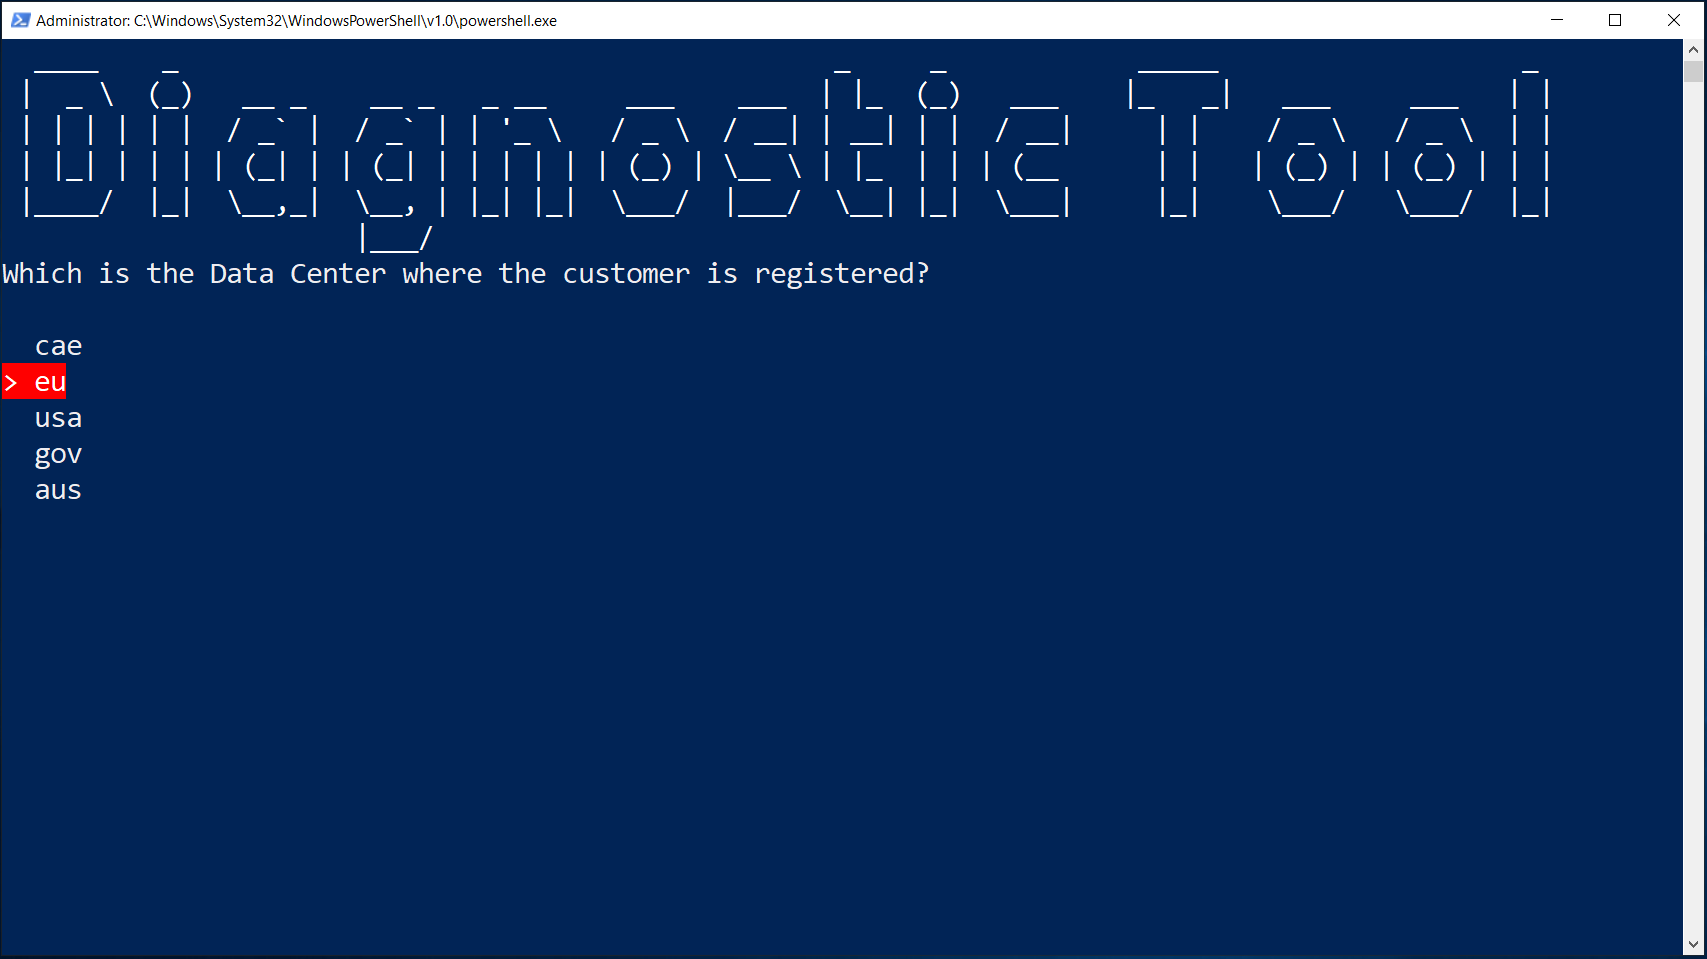
On the screen that appears, you will have the option to select your data center. Press Enter to establish a connection to the selected CoreView Data Center.

Step 2: select tests

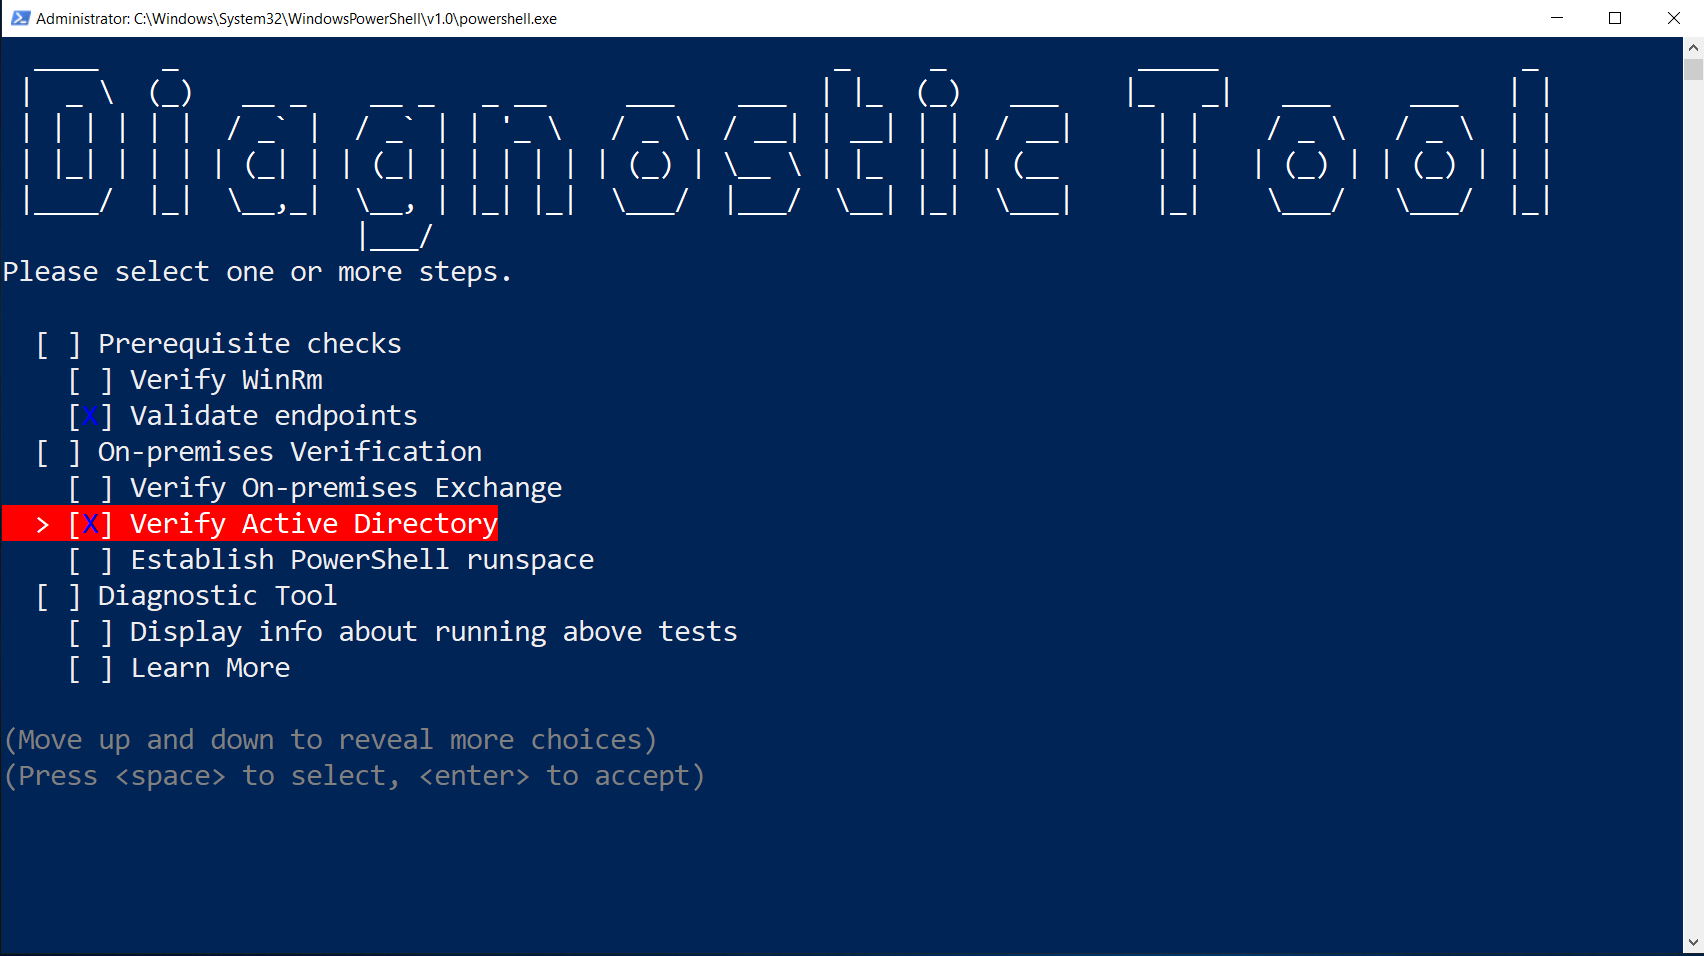
From the above menu, you can select any test you would like to perform to evaluate if your CoreView Hybrid Connector will work in your environment. Press the spacebar to select an option and Enter to confirm it.
Prerequisite checks (selecting this option will automatically select the sub-options listed below):
- Verify WinRm will test your configuration of the WinRM protocol used for connecting to your Active Directory domain controller.
- Validate endpoints will simulate connections to internet endpoints used by the CoreView Hybrid Connector.
On-premises verification (selecting this option will automatically select the sub-options listed below):
- Verify On-premises Exchange will test connectivity, authentication method, and protocols used for connecting to your Exchange Server.
- Verify Active Directory will test connectivity and the protocol used for connecting to your Active Directory domain controller.
- Establish PowerShell runspace will open a PowerShell runspace without any PowerShell module already loaded, where you can manually input the cmdlets you would like to test.
Establish Powershell runspace
If you are interested in conducting tests beyond the default options of the CoreView Diagnostic Tool menu, this feature allows you to open a PowerShell runspace similar to what the CoreView Hybrid Connector uses.
For information on the versions of PowerShell and its modules supported by CoreView, consult the article on PowerShell versions and features supported by CoreView. Ensure you download and install the corresponding module version on the CoreView Diagnostic Tool before proceeding.
Keep in mind that any module you install will only be available in your runspace for the duration of the session. Exiting the runspace by typing "exit" and pressing Enter will clear all imported modules and executed commands.
Below is a list of cmdlets that may be useful for testing additional connections with the CoreView Hybrid Connector using this feature of the CoreView Diagnostic Tool:
# Enable Tls protocol to perform https connection tests
        [Net.ServicePointManager]::SecurityProtocol = "Tls, Tls11, Tls12, Ssl3"
        # Test Microsoft Connection
        Invoke-webrequest -uri https://www.microsoft.com -UseBasicParsing
        # Test SSL Certificate revokation list
        Invoke-webrequest -uri https://sectigo.com -UseBasicParsing
# Test Exchange Online Connection
$adUsername = "upn"
$adPassword = "password" | ConvertTo-SecureString -AsPlainText -Force
$Credentials = new-object -typename System.Management.Automation.PSCredential -argumentlist $adUsername, $adPassword
$cs = Get-Credential -Credential $Credentials
Connect-ExchangeOnline -Credential $cs# Test Teams Connection
[Net.ServicePointManager]::SecurityProtocol = [Net.SecurityProtocolType]::Tls12
$adPassword = "password"
$adUsername = "username"
$adPassword = $adPassword | ConvertTo-SecureString -AsPlainText -Force
$Credentials = new-object -typename System.Management.Automation.PSCredential -argumentlist $AdUsername, $adPassword
$cs = Get-Credential -Credential $Credentials
Connect-MicrosoftTeams -Credential $cs -LogFilePath "c:/temp/teams-logs.txt"
Get-CsApplicationAccessPolicy | convertTo-Json Shortcuts to connect to Active Directory and Exchange On-Premises
We have introduced shortcuts that enable you to quickly connect to Active Directory and Exchange On-Premises without the need for PowerShell commands.
Please note that the shortcuts listed below are only available for the 2019 and 2022 versions.
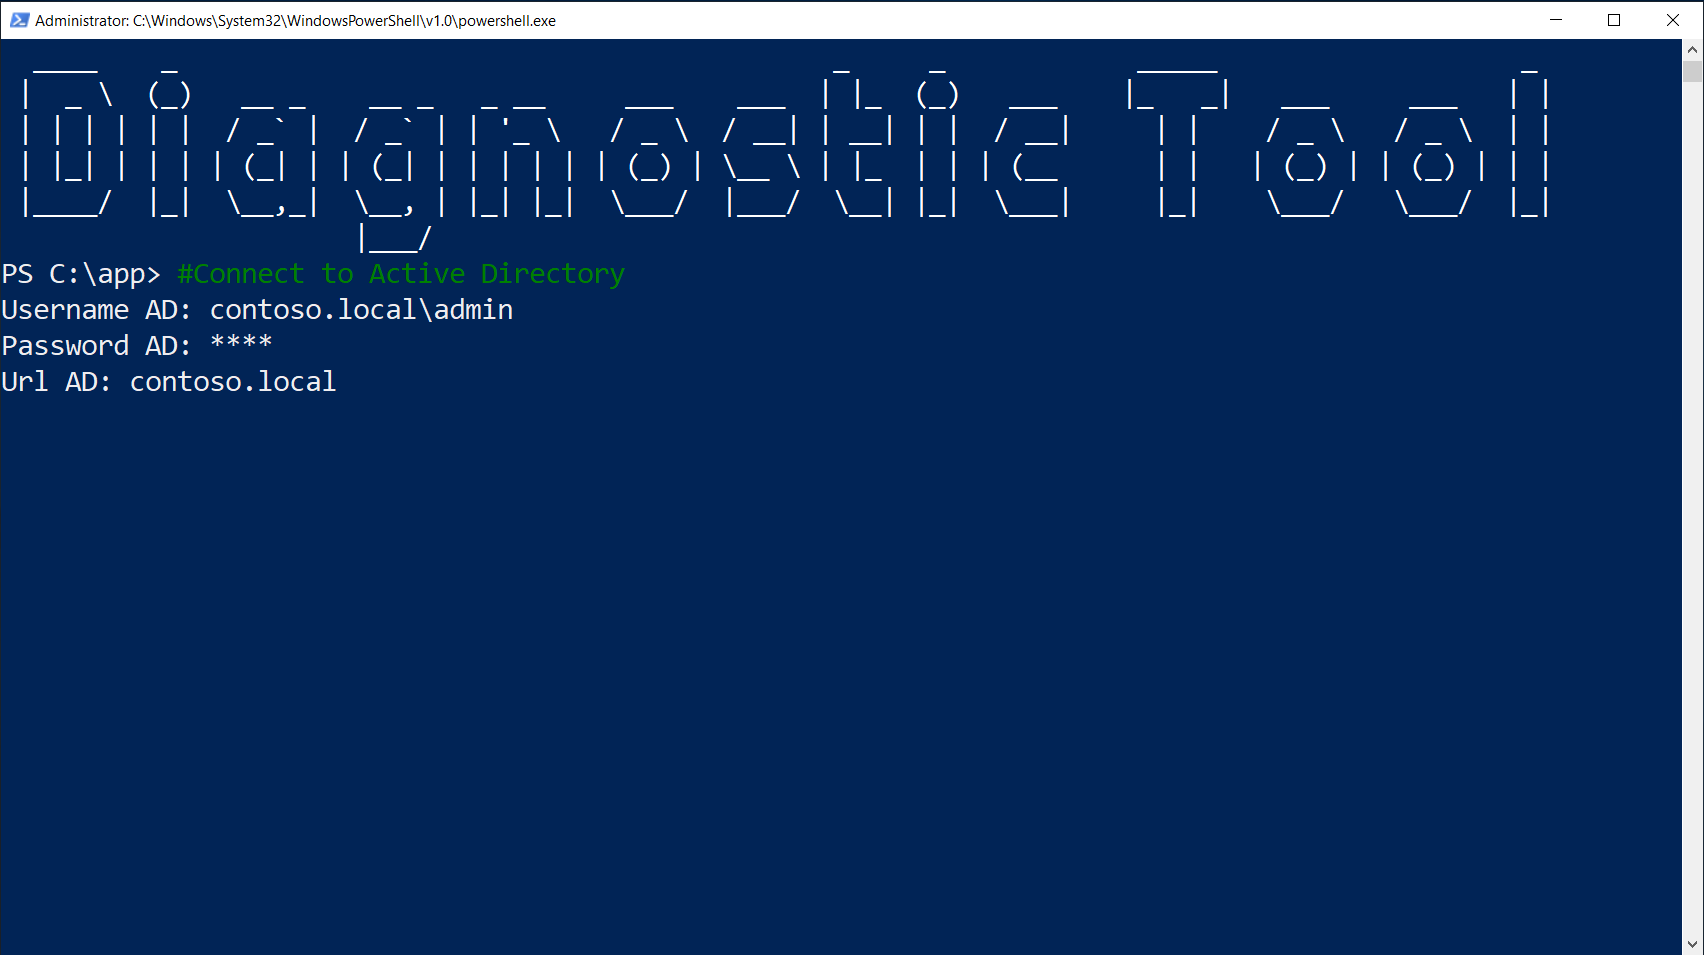
Connect to Active Directory
To connect to Active Directory, simply press Ctrl + Q. You will then be prompted to input your Active Directory username, password, and the connection URL.

Connect to Exchange On-Premises
To connect to Exchange On-Premises, press Ctrl + W. You will be prompted to enter your Exchange username, password, and the connection URL.
Diagnostic Tool (selecting this option will automatically select the sub-options listed below):
- Display info about running above tests should be used in combination with other tests and it will save the results of the executed tests in a file located in the C:\temp directory.
- Learn More will display detailed information about the above options.
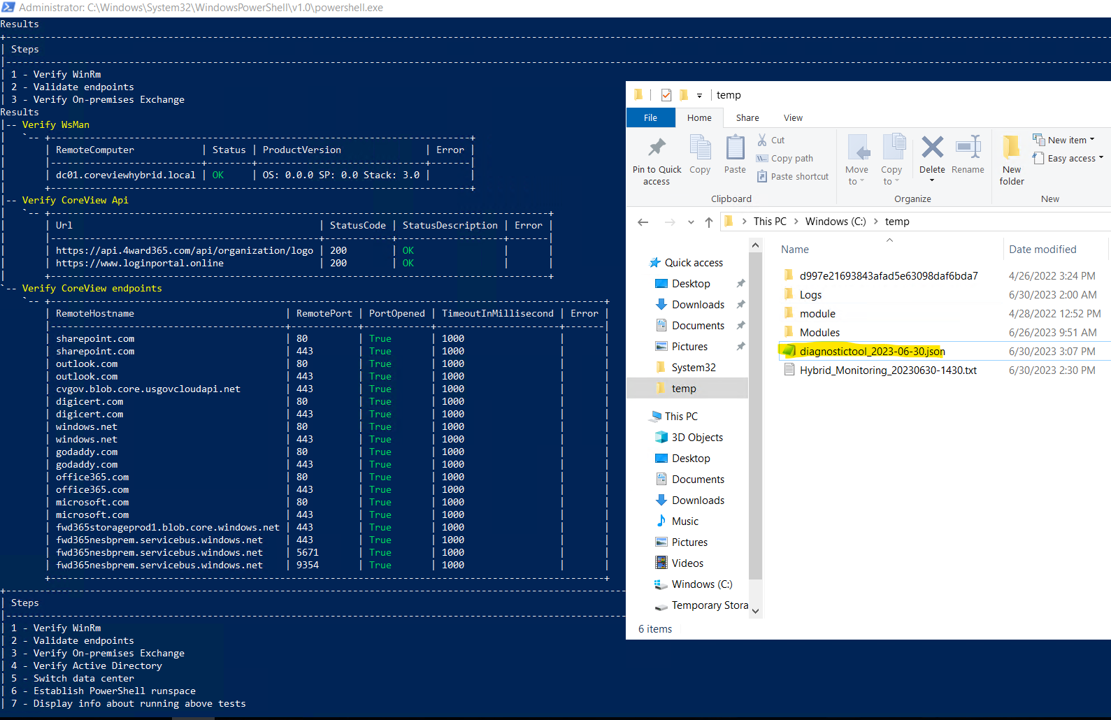
Example
For example, you can select and run:
- Verify WinRm
- Validate endpoints
- Display info about running above tests
and you will find the results also displayed in a JSON file saved on your C: drive.

When prompted, please ensure to provide the same credentials you plan to configure on the CoreView Hybrid Connector as service accounts. For instructions, refer to the Hardening your hybrid environment article.
