Auto attendants in Microsoft Teams streamline call routing, enhance caller experience, and ensure that customers and colleagues reach the right person or department quickly. There are three ways to set up auto attendant in Microsoft Teams:
1. Using Microsoft Teams admin center
To set up an auto attendant in Microsoft Teams, follow these steps:
- Log in to the Microsoft Teams admin center using your admin credentials.
- From the left-hand navigation menu, select “Voice > Auto attendants”.
- Click on the “Add” button to create a new auto attendant.

- Enter a name for your auto attendant and select the language you want to use.
- Choose the type of call handling you want your auto attendant to use
- Set up your greetings and prompts by recording your own or using the default ones.
- Assign the auto attendant to a phone number or a specific user in your organization.

- Save your changes and test your auto attendant to ensure it's working correctly.
To set up an auto attendant in Microsoft Teams, you must have an active Microsoft Teams Phone System license. If you do not have this license, you will not be able to access the auto attendant feature.
For more details, please refer to the “Set up Microsoft Teams auto attendant" article.
2. Using PowerShell:
You can create and configure a Teams auto attendant via PowerShell for advanced scenarios or automated deployment. The steps below use the MicrosoftTeams PowerShell module (v5.6 or later recommended):
Step 1: Connect to Microsoft Teams PowerShell:
Connect-MicrosoftTeamsStep 2: Create a Resource Account for the Auto Attendant
New-CsResourceAccount -Name "Auto Attendant Main" -UserPrincipalName aamain@contoso.com -Type AutoAttendantStep 3: Assign a Phone Number to the Resource Account
If using Calling Plan or Operator Connect:
Set-CsPhoneNumberAssignment -Identity aamain@contoso.com -PhoneNumber +1XXXXXXXXXX -PhoneNumberType CallingPlanReplace +1XXXXXXXXXX with your actual phone number.
Step 4: Create the Auto Attendant
First, create a greeting prompt (optional):
$greeting = New-CsAutoAttendantPrompt -TextToSpeechPrompt "Thank you for calling Contoso. Please select from the following options."Next, create a menu (for example, 1 for Sales, 2 for Support):
$sales = New-CsAutoAttendantMenuOption -DTMFResponse 1 -CallTargetType Person -CallTarget "user1@contoso.com"
$support = New-CsAutoAttendantMenuOption -DTMFResponse 2 -CallTargetType Person -CallTarget "user2@contoso.com"
$menu = New-CsAutoAttendantMenu -Name "Main Menu" -MenuOptions $sales,$support
Then, create the call flow:
$callFlow = New-CsAutoAttendantCallFlow -Menu $menu -Greetings $greetingNow, create the auto attendant and associate it with the resource account:
New-CsAutoAttendant -Name "Contoso Main AA" -ResourceAccountList aamain@contoso.com -CallFlows $callFlowStep 5: Optional: Set Business Hours, After Hours, Holidays
You can further configure separate call flows for business, after hours, or holidays using additional New-CsAutoAttendantCallFlow and schedule objects.
3. Using CoreView:
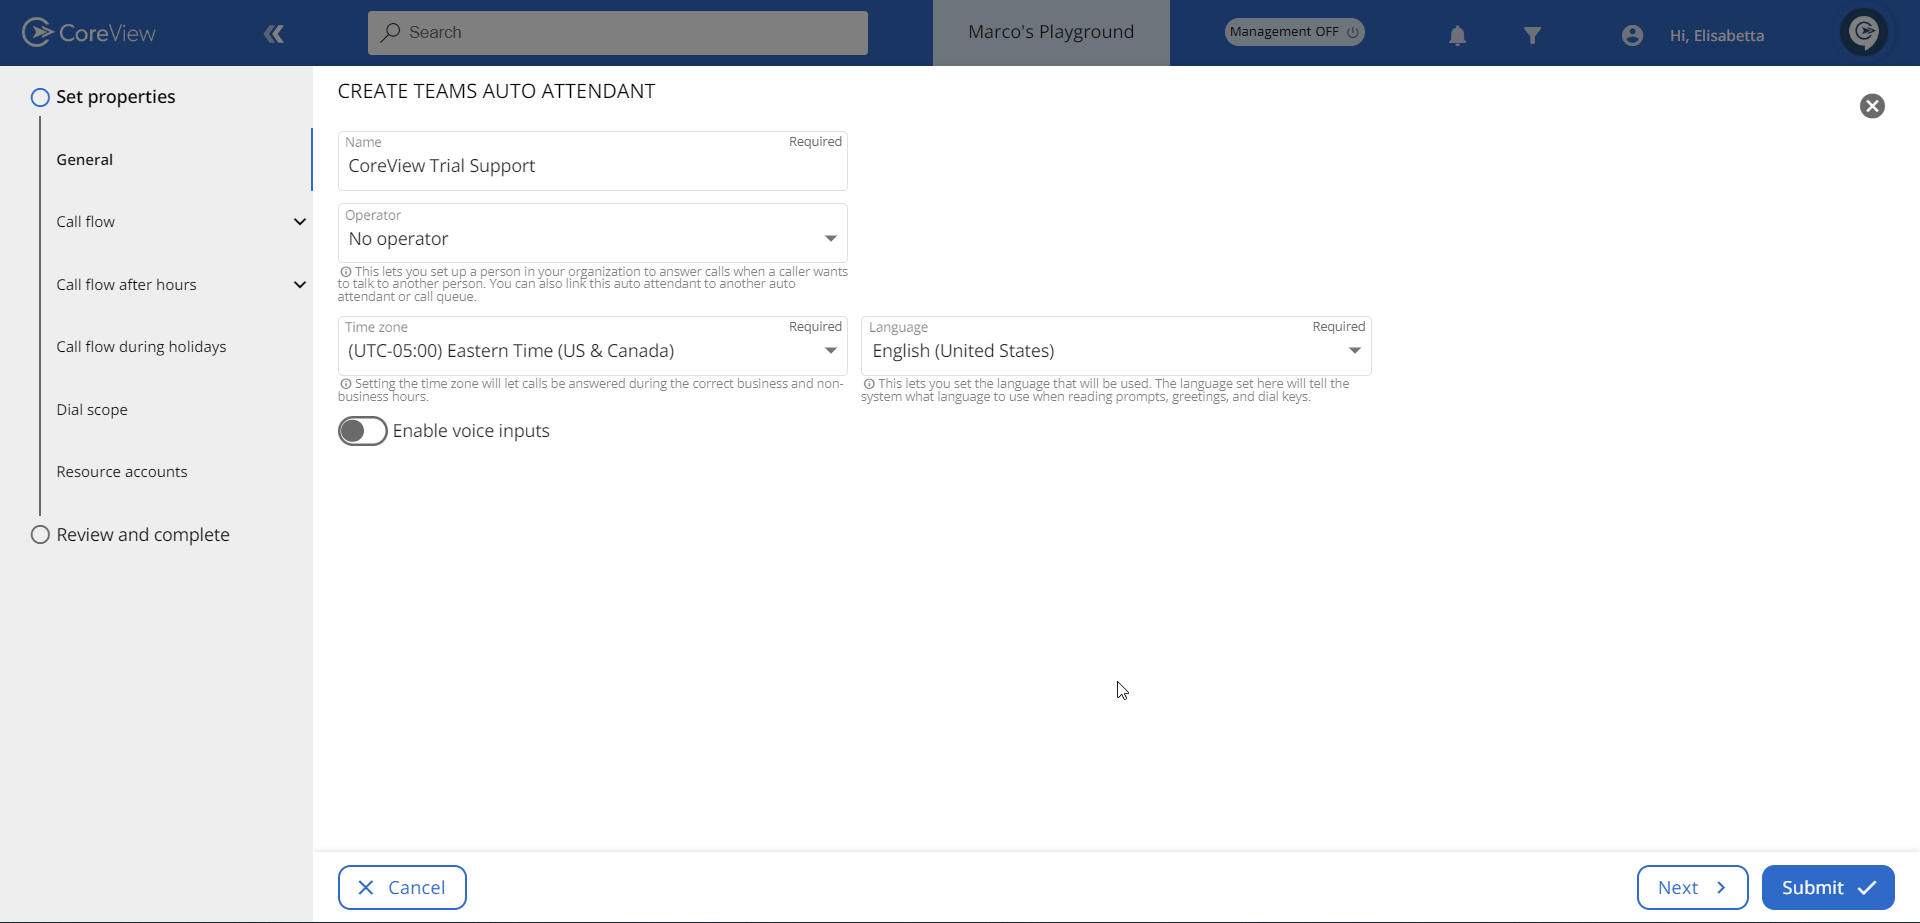
- Navigate to the CoreView app
- Select “Actions > Management Actions > Teams > Create Teams auto attendant”

You will be presented with a screen where you will need to fill in all the details.
You can either play an audio file or type in a greeting message or choose no greetings.
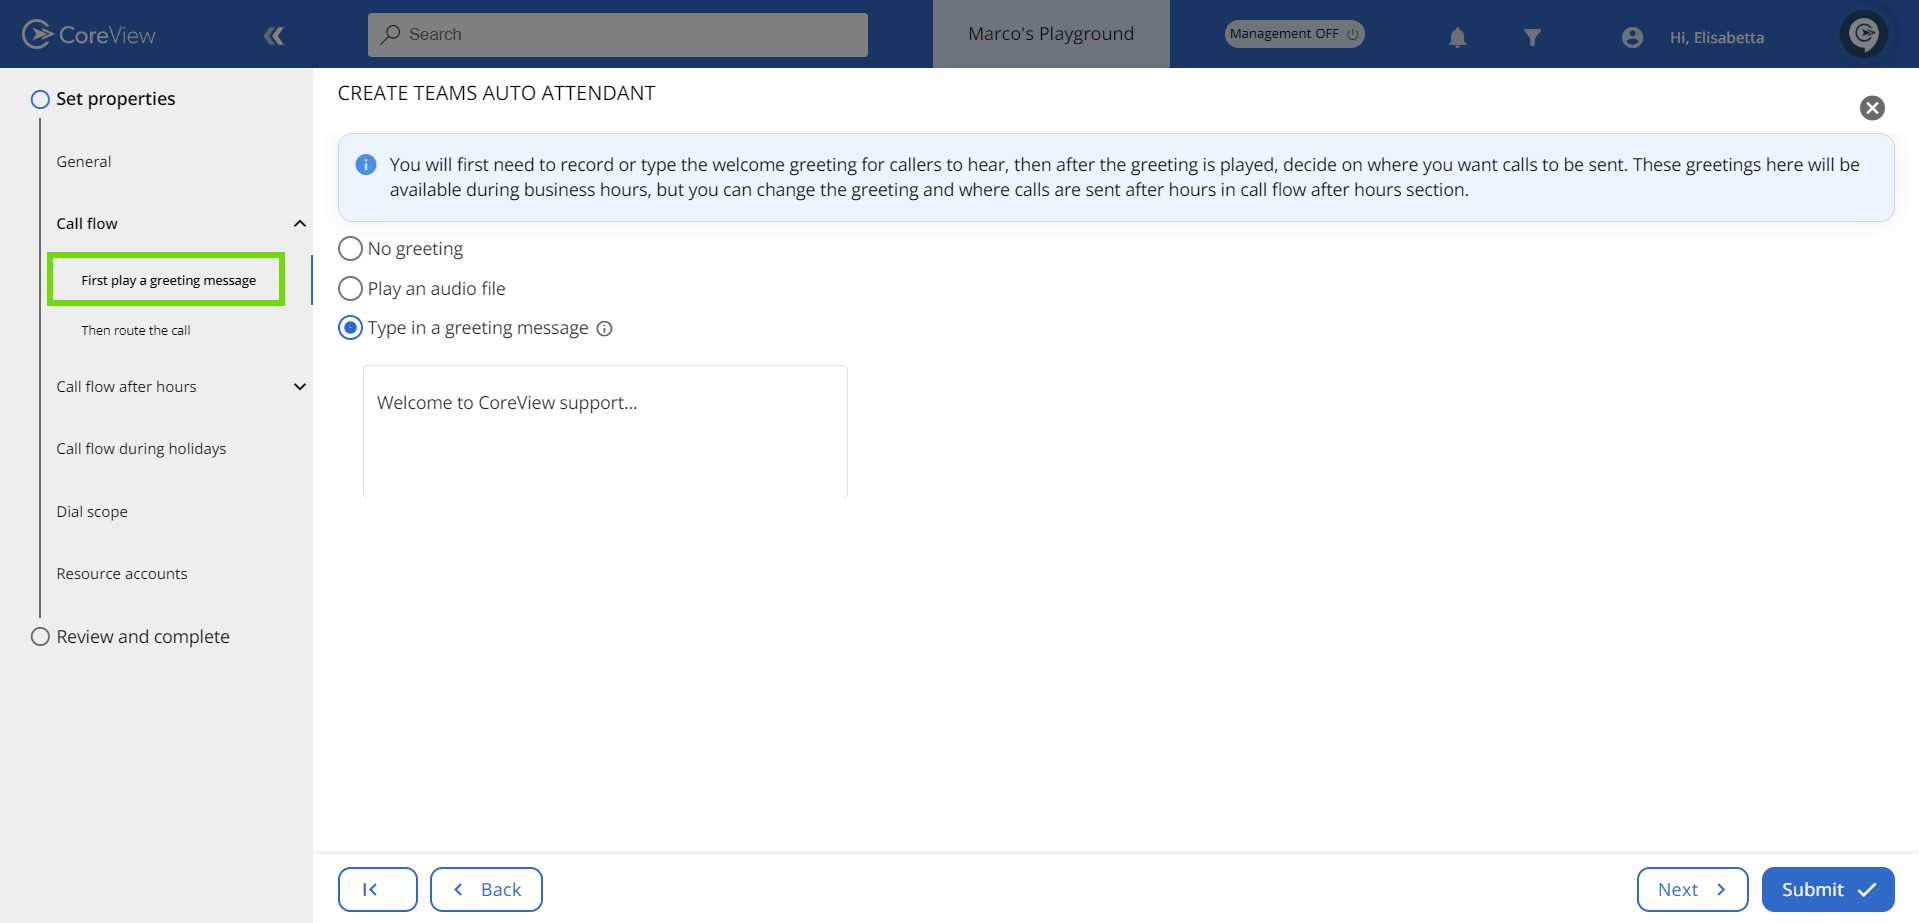
- On the next page you can select various options to route the call.

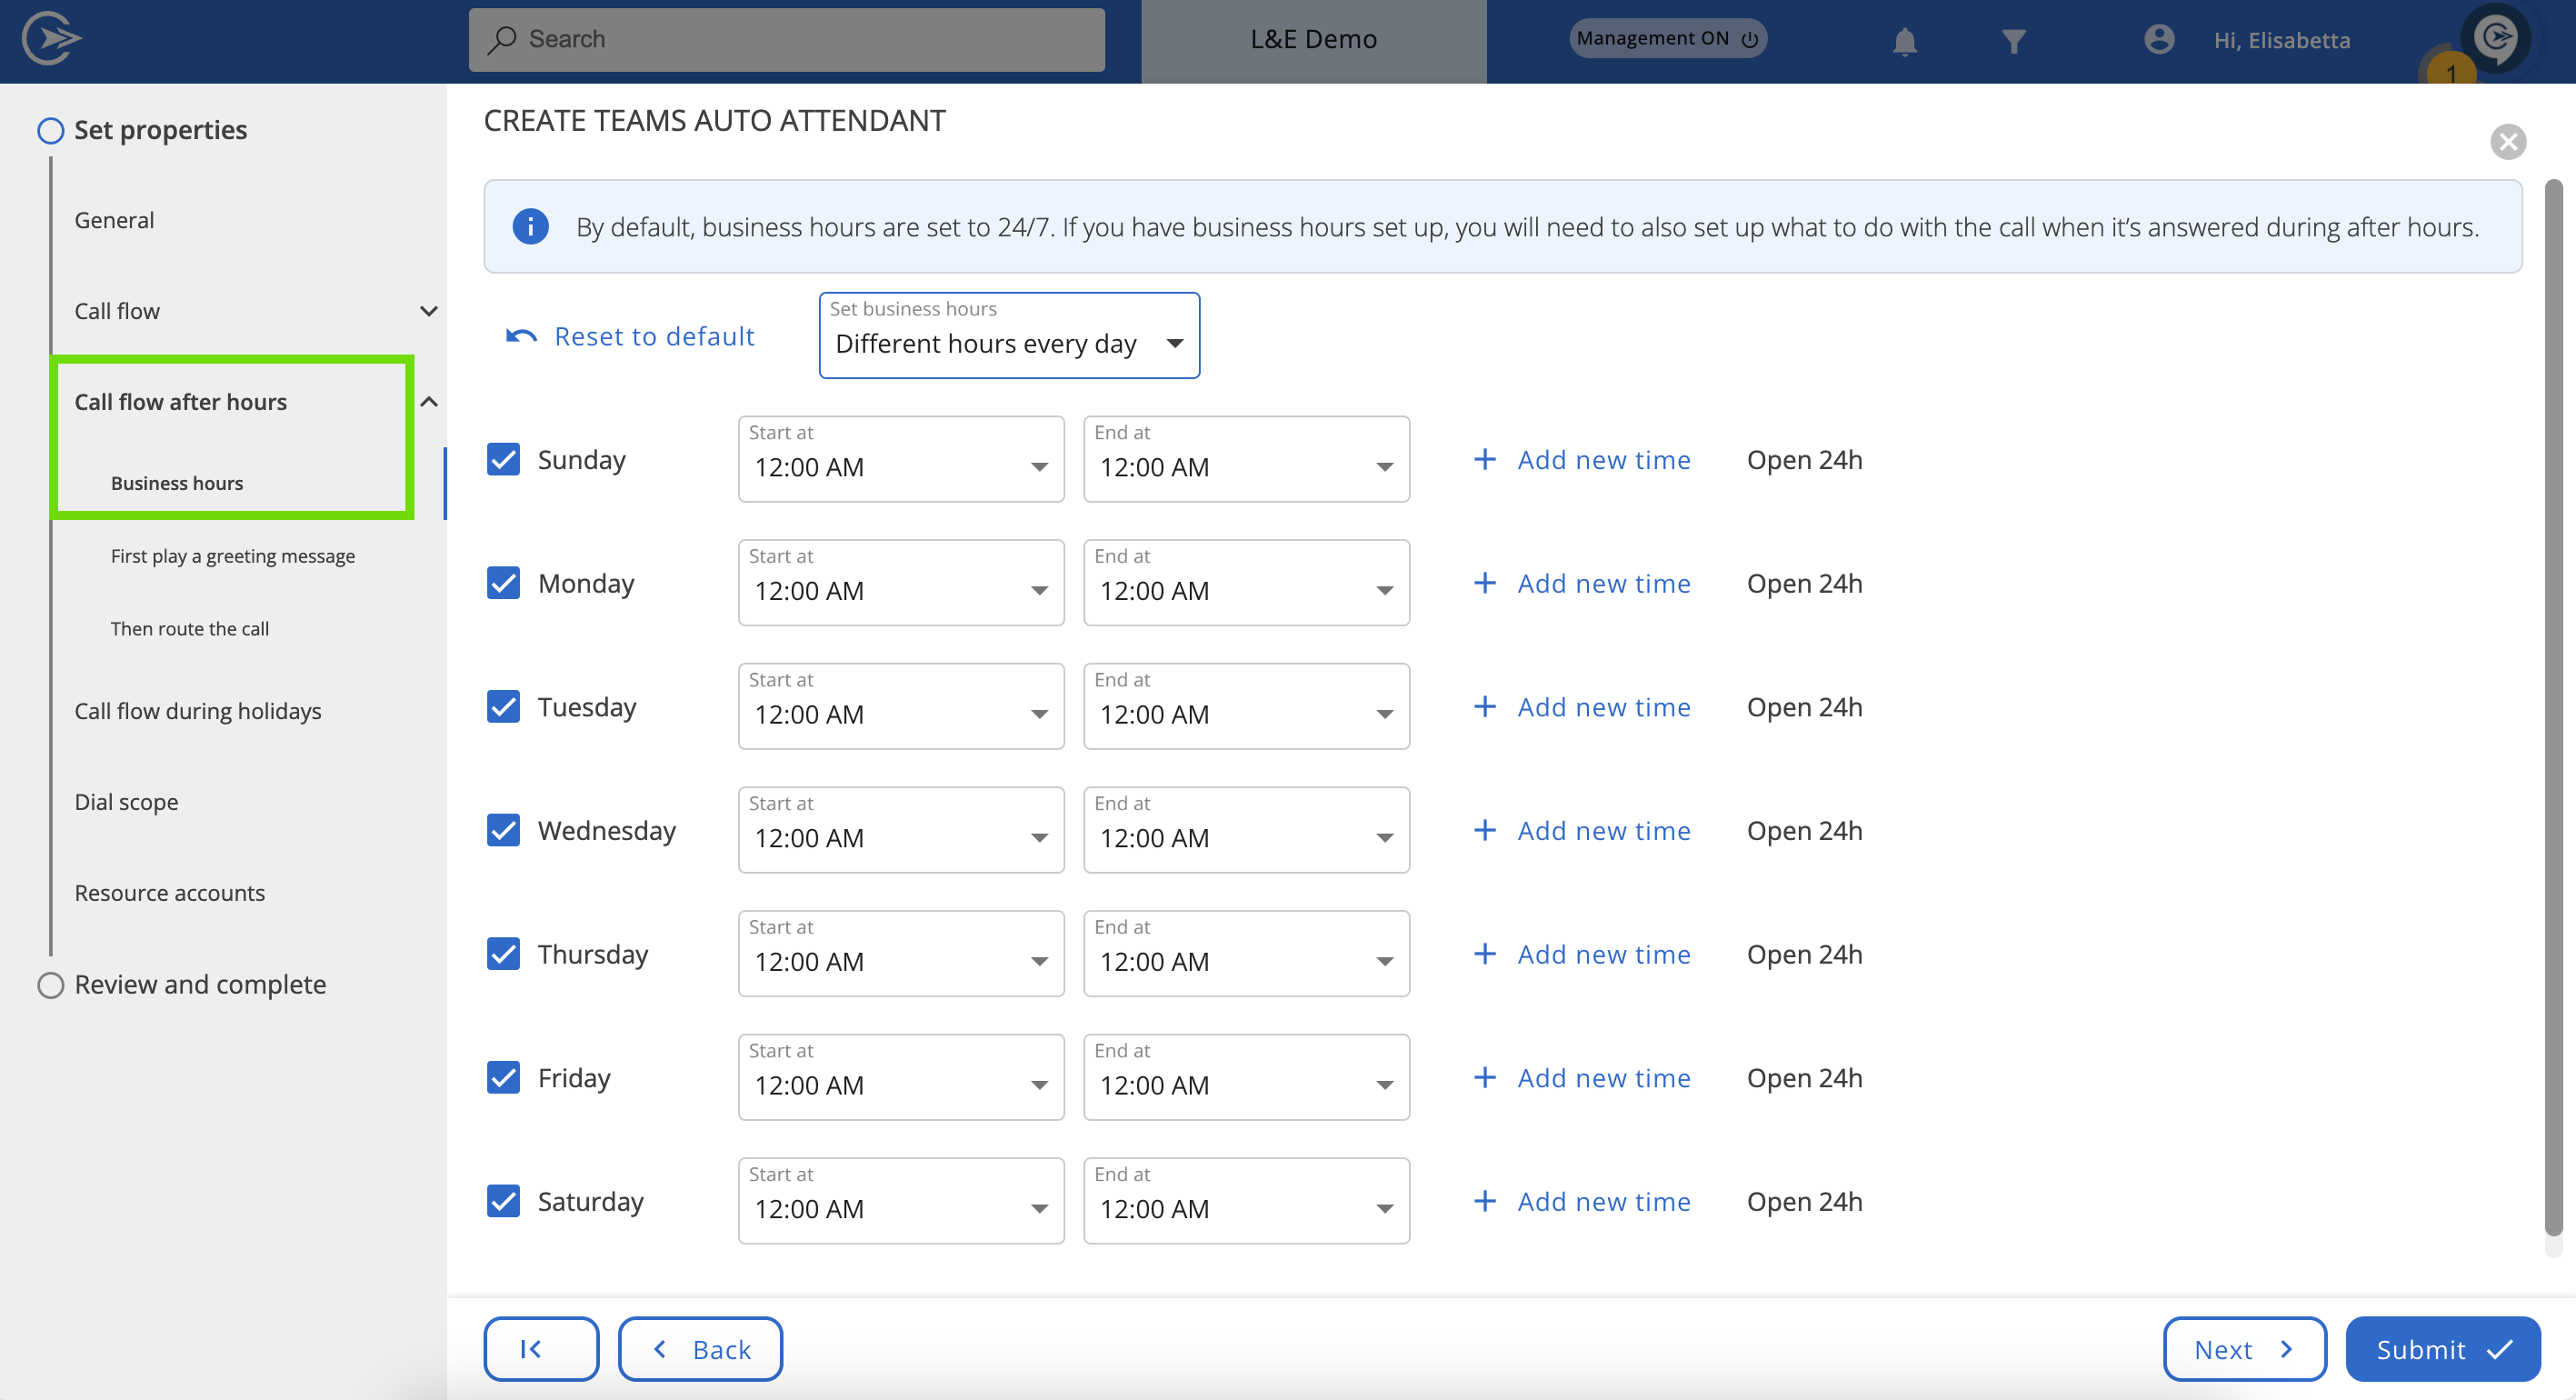
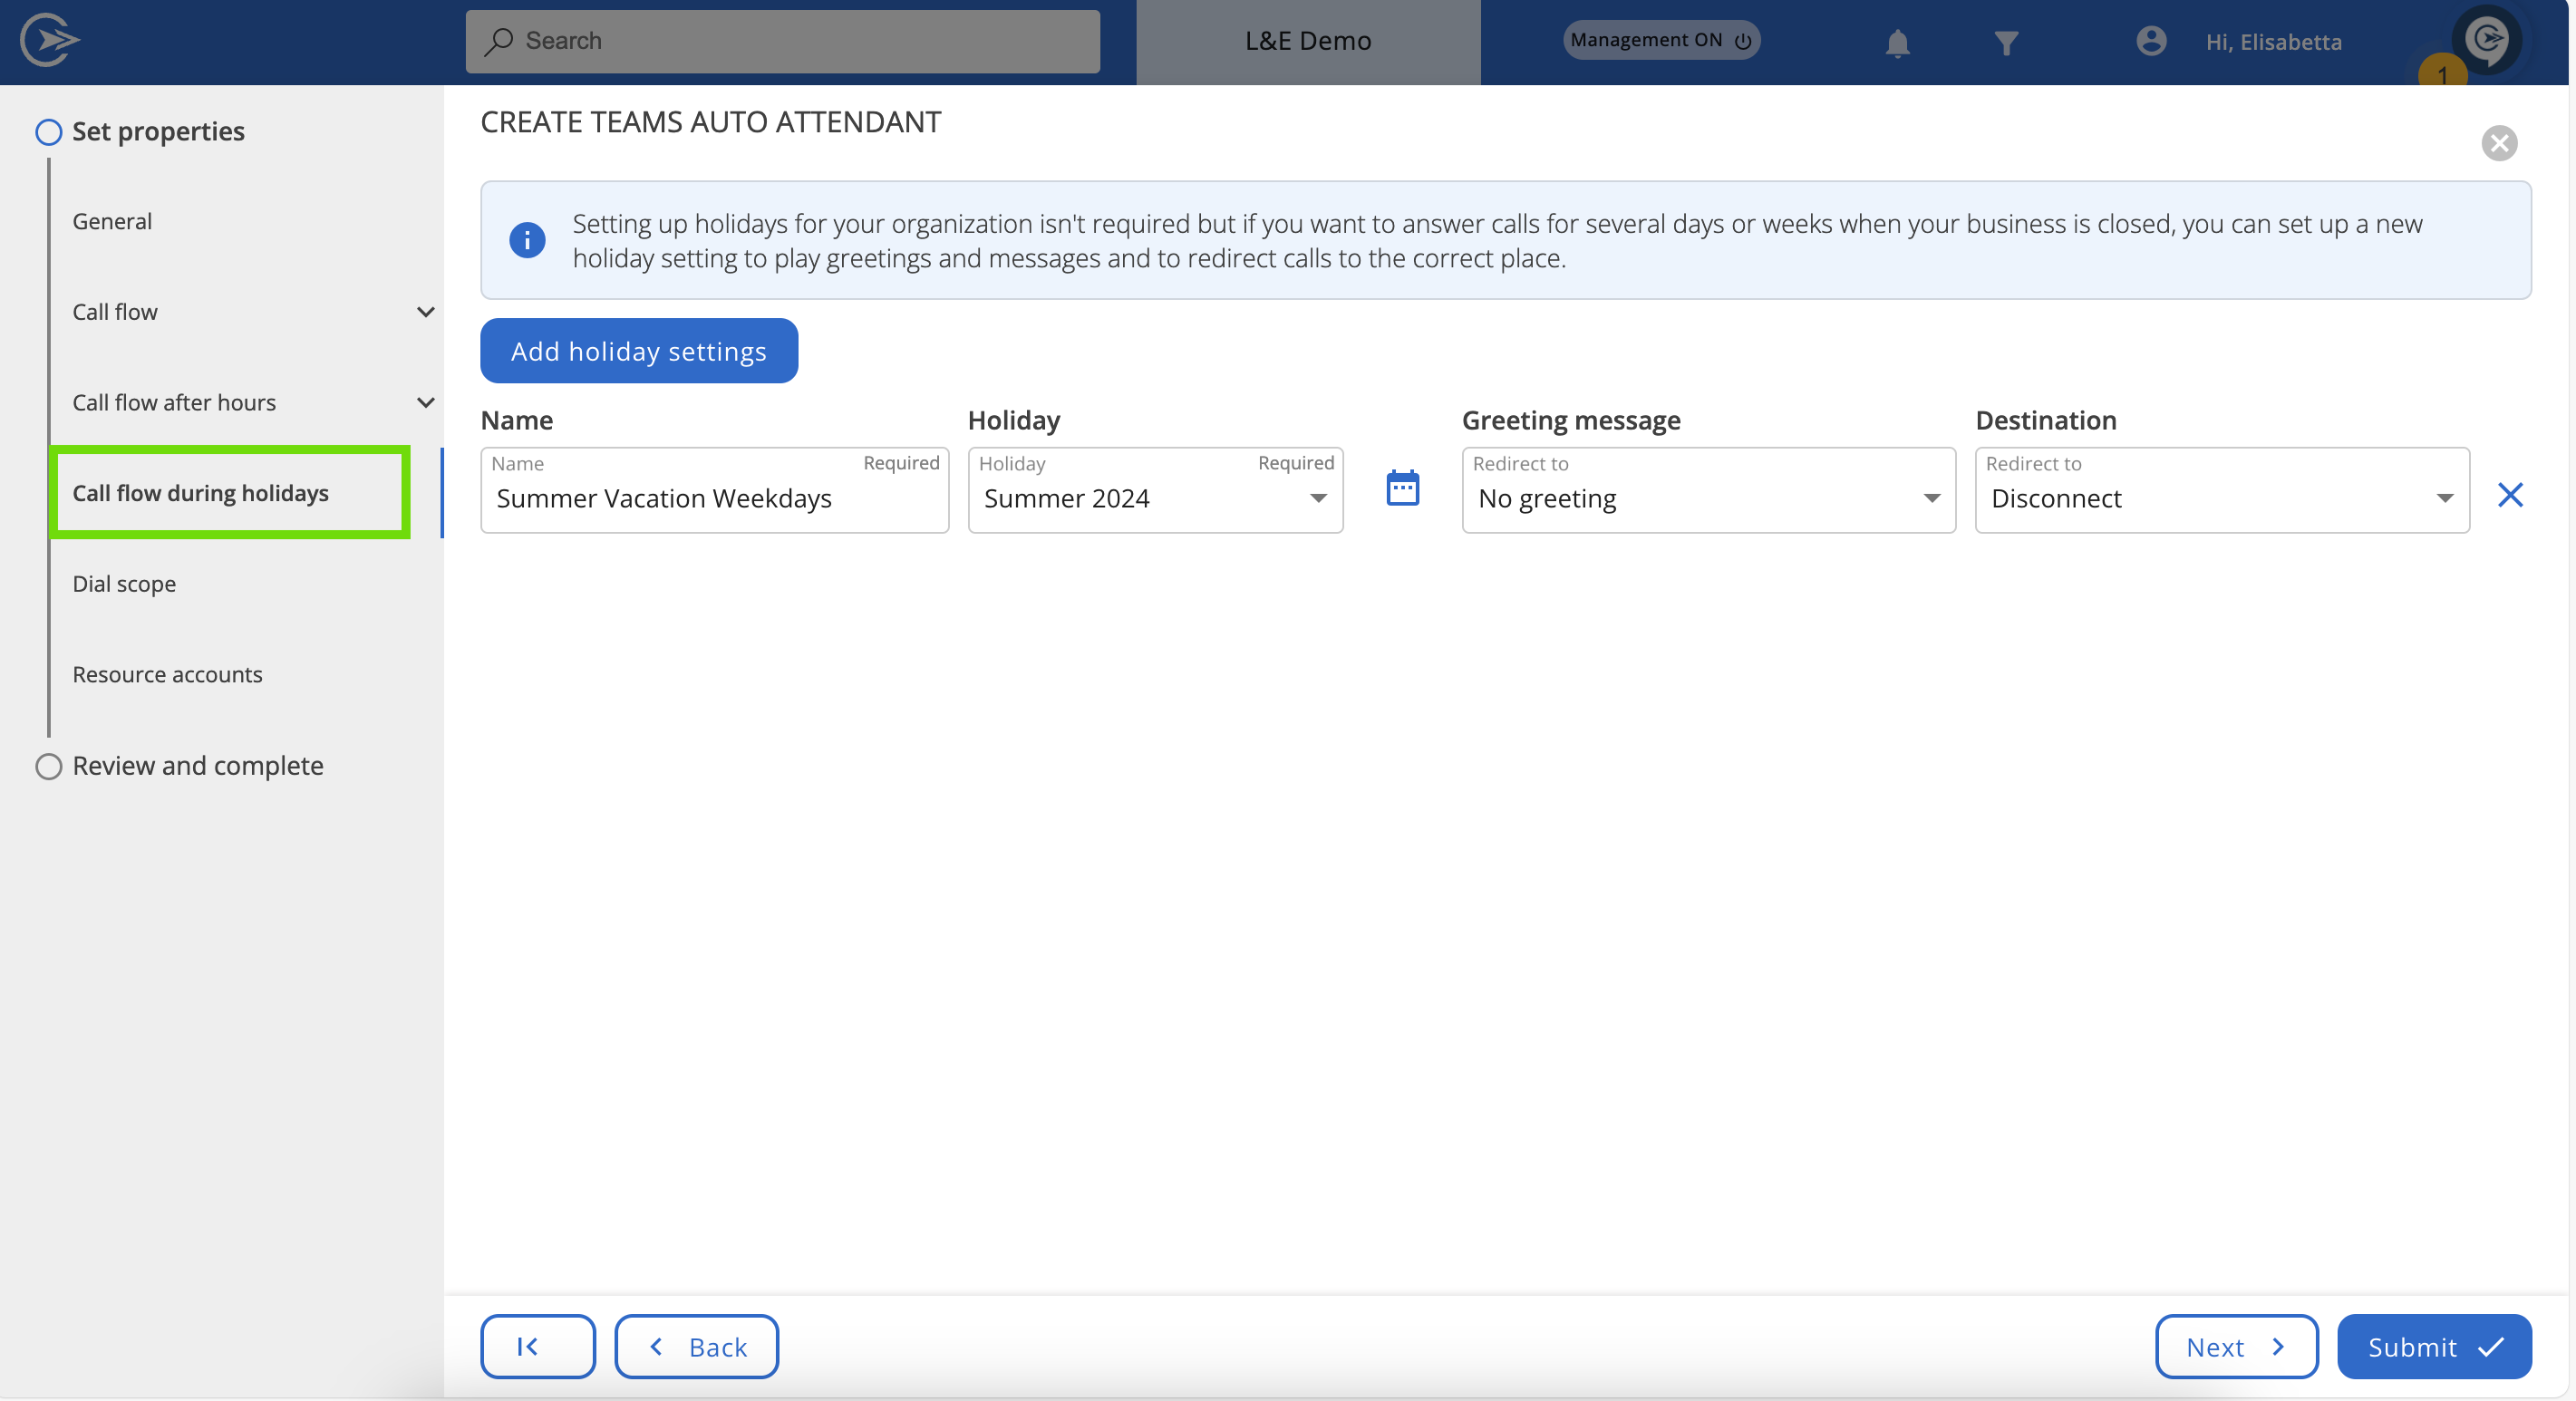
- Next, you can set up call flows after hours and call flows during holidays based on your requirements.
- You can set up the users or groups that will be listed and available in your organization’s directory when a caller dials into this auto attendant. When callers use dial by name and search for a person by their name using their voice or keypad, they will be then transferred to the user that has the Teams app installed.

- You can finally review and submit to create the auto attendant.