Les Workflows ne sont pas disponibles dans la solution Essentials.
Exercice Workflow : supprimer les comptes invités
L’objectif de cet exercice est de configurer un Workflow qui supprimera automatiquement les comptes d’utilisateurs invités âgés d’au moins six mois et inactifs depuis plus de 180 jours, de manière hebdomadaire.
Dans cet exercice, vous apprendrez :
- Comment créer un Workflow
- Comment configurer une entrée d’exécution
- Comment ajouter et configurer une action
- Comment publier un Workflow
- Comment planifier un Workflow sur une stratégie personnalisée
L’exercice est divisé en deux parties : dans la première, nous allons créer le Workflow, et dans la seconde, nous le planifierons sur une stratégie personnalisée dans un playbook que nous créerons spécifiquement.
Vous pouvez utiliser le didacticiel interactif ou suivre le guide étape par étape dans les accordéons.
Première partie : comment créer un Workflow
Étape 1 : créer un nouveau Workflow
La première étape consiste à créer un Workflow qui inclut une action pour supprimer les utilisateurs invités.
Pour plus d’informations, consultez l’article : Créer un Workflow.
- Cliquez sur l’onglet « ACTIONS » dans la barre latérale.
- Cliquez sur « Gérer les Workflows ».
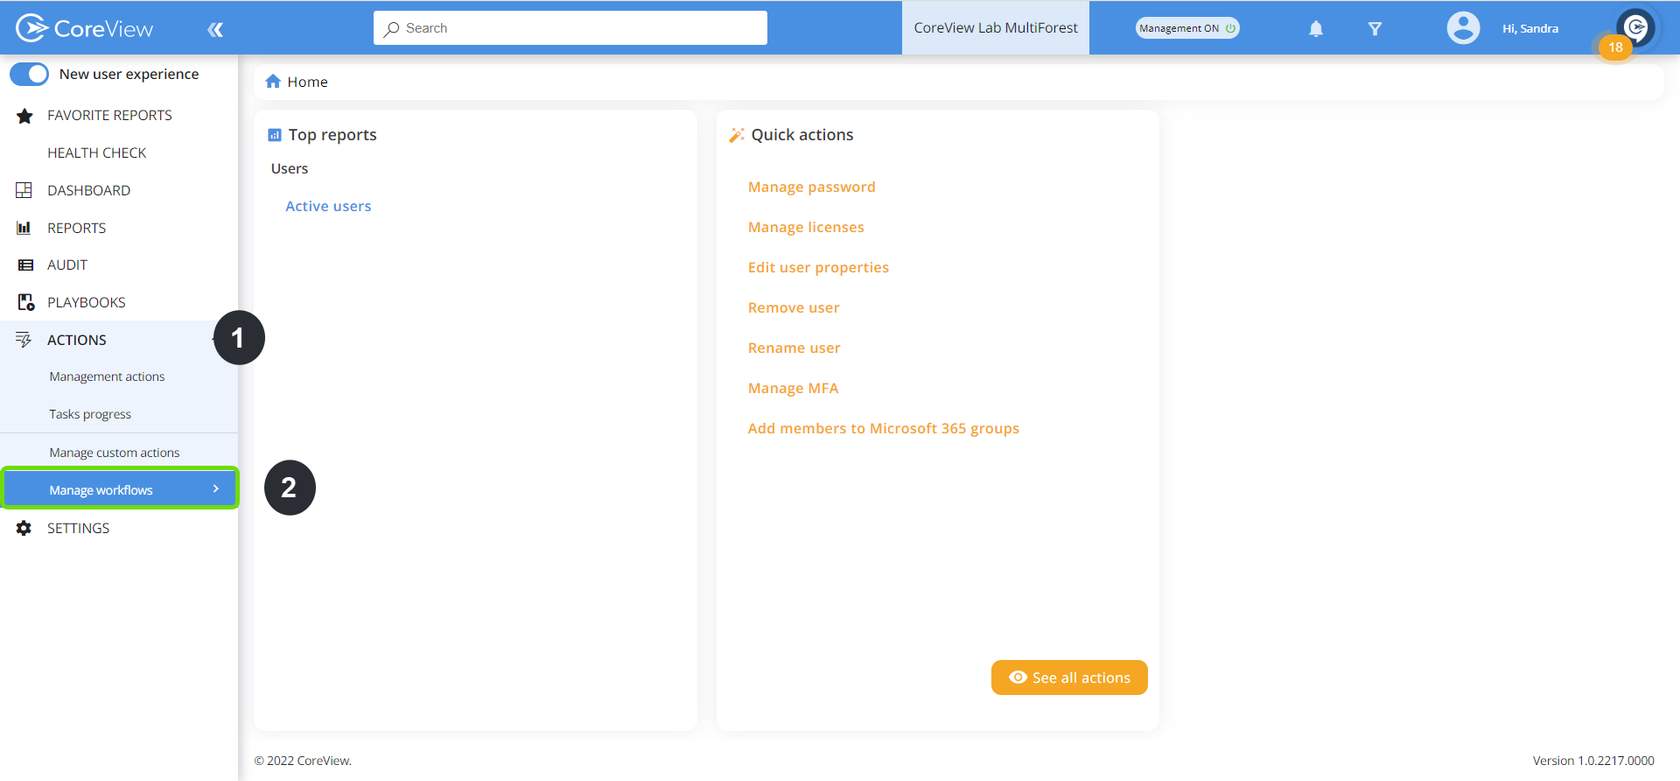
- Sélectionnez « Workflows ».
- Sélectionnez « Créer un nouveau ».

Étape 2 : configurer l’entrée d’exécution
Nous allons maintenant configurer les « entrées d’exécution », également appelées variables d’entrée, qui sont des données essentielles requises pour lancer le Workflow.
Pour plus d’informations, consultez l’article : Configurer les entrées d’exécution.
- Cliquez sur l’icône de crayon et tapez le nom « Supprimer les comptes utilisateurs invités » dans le champ « Nom ».
- (Facultatif) : Cliquez sur le bouton « Description » sous le nom du Workflow pour ajouter une description.
- Cliquez sur « Configurer l’entrée d’exécution », puis sur « Ajouter une entrée d’exécution » sur la page suivante.
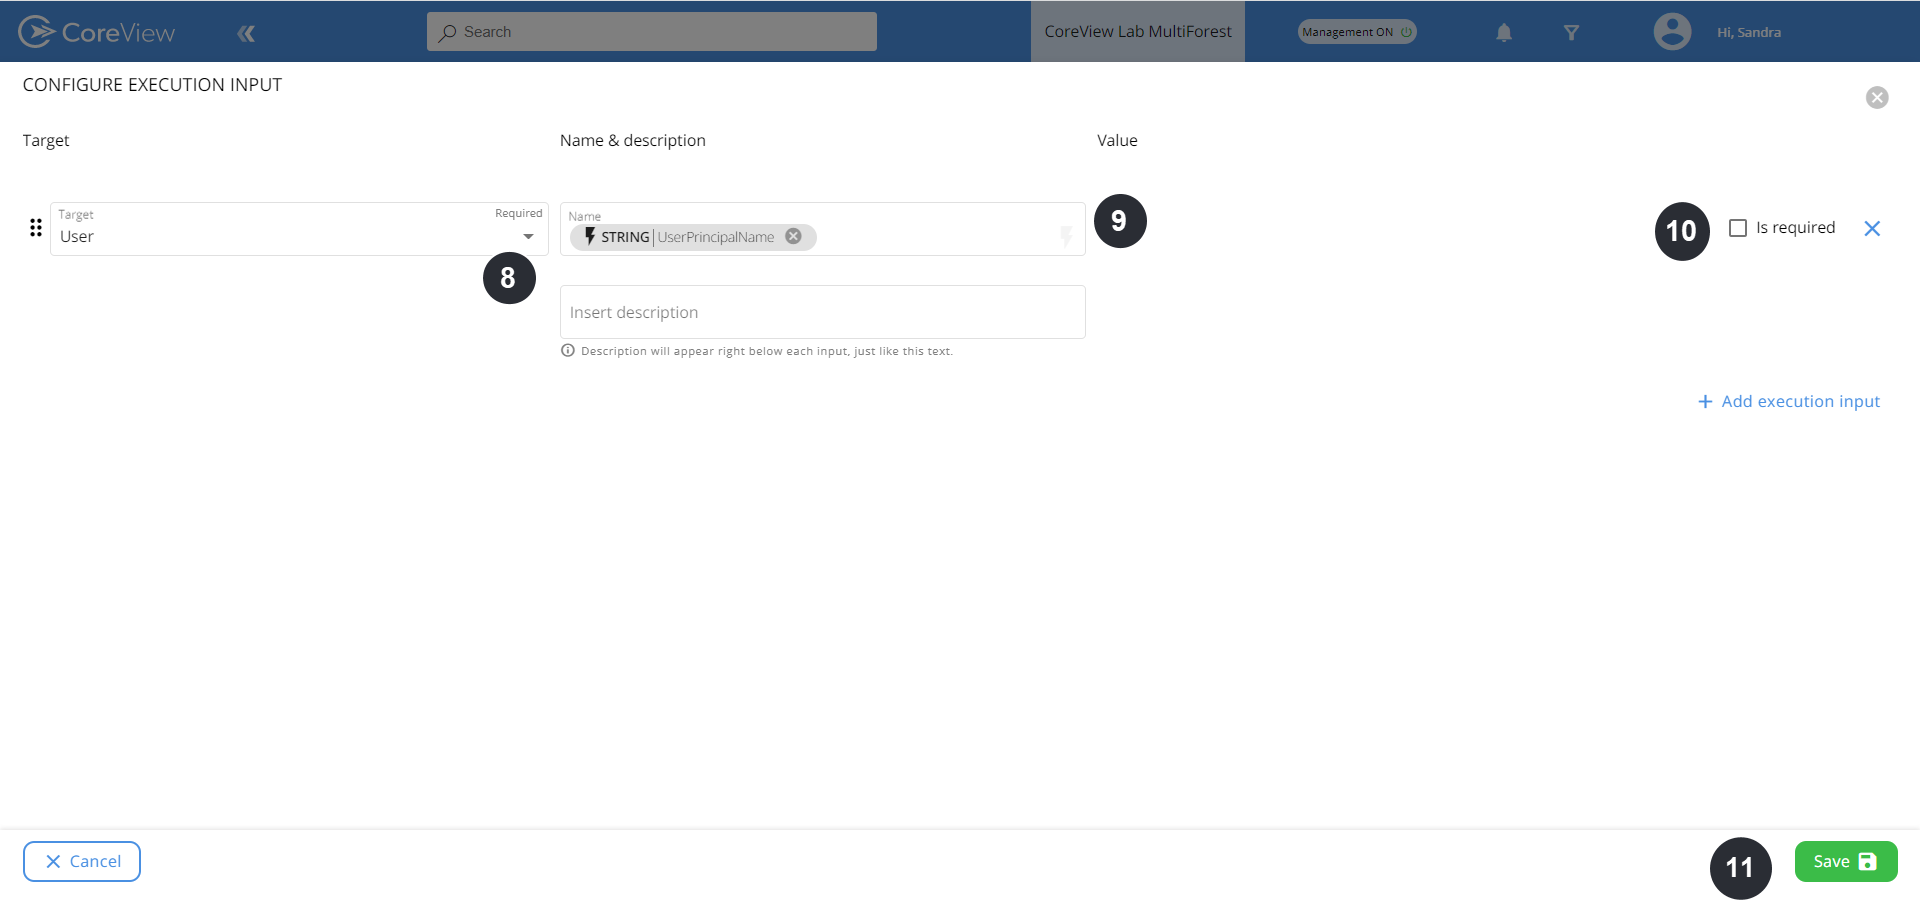
- Sous « Cible », sélectionnez « Utilisateur » dans le menu déroulant.
- Recherchez « UserPrincipalName » dans la liste et cliquez dessus.
- Vérifiez que la case « Requis » est cochée.
- Cliquez sur « Enregistrer ».

À ce stade, vous avez spécifié et créé l’entrée d’exécution requise pour votre Workflow.
Étape 3 : ajouter et configurer une action
Après avoir défini les entrées d’exécution, nous pouvons ajouter des actions, qui sont les tâches individuelles constituant un Workflow.
Pour plus d’informations, consultez l’article : Ajouter des actions de Workflows.
- Dans le menu déroulant « Ajouter », cliquez sur le bouton « Ajouter une action ».
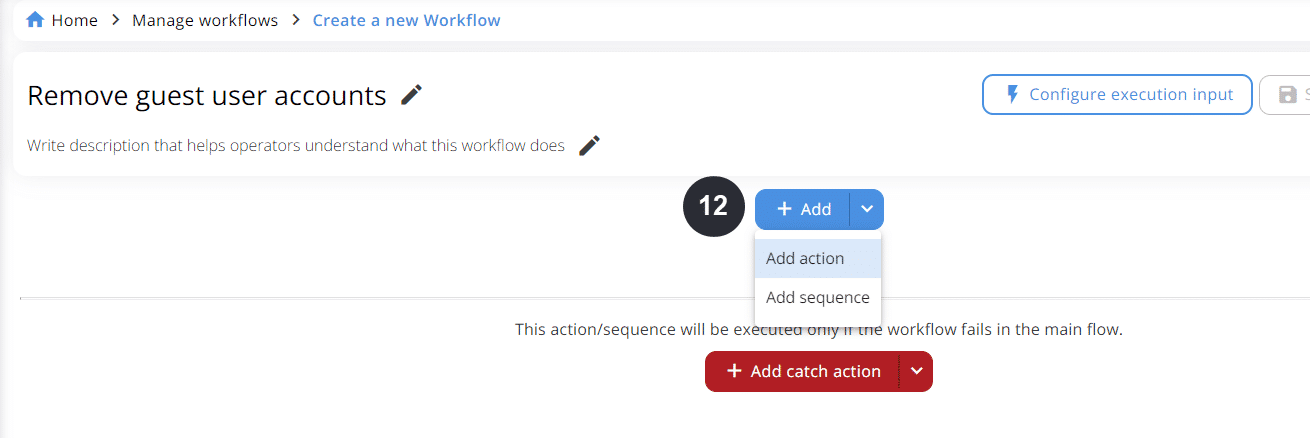
- Dans la catégorie « Action », sélectionnez « Utilisateur ».
- Dans le menu déroulant « Sélectionner une action », sélectionnez « Supprimer l’utilisateur invité ».
- Sous « Paramètres », cliquez sur l’icône éclair à droite du champ User Principal Name.
Choisissez l’entrée "UserPrincipalName" que vous avez précédemment créée dans la liste affichée. - Cliquez sur « Enregistrer ».

Étape 4 : publier un Workflow
Commençons par enregistrer notre Workflow comme brouillon, puis publions-le.
Pour plus d’informations, consultez l’article : Publier.
- Cliquez sur « Enregistrer » en haut à droite. Cela enregistrera votre Workflow comme brouillon.
Ensuite, cliquez sur « Publier » en haut à droite : cela publiera votre Workflow et le rendra disponible pour vous, ainsi que pour toute personne à qui vous accordez un accès.

Deuxième partie : comment ajouter à un playbook
Étape 5 : planifier un Workflow sur une politique personnalisée
Un Workflow peut être planifié sur une stratégie personnalisée. Nous allons créer une stratégie personnalisée à partir d’un rapport et y associer le Workflow pour l’utiliser comme action de remédiation.
Pour plus d’informations, consultez l’article : Créer une politique personnalisée.
- Allez dans « RAPPORTS » > « UTILISATEURS » > « Utilisateurs invités ».
- Affichez les colonnes « Date de la dernière activité Microsoft 365 » et « Date de création », ainsi que la colonne « Nom principal de l’utilisateur » qui alimentera l’entrée d’exécution pour le Workflow.
- Ajoutez le filtre « Non dans les N derniers jours » = 180 à la fois à la colonne « Date de création » et à la colonne « Date de la dernière activité Microsoft 365 ».

- Sélectionnez « Actions » et cliquez sur « Créer une stratégie personnalisée ».

- Renseignez tous les champs obligatoires : « Nom », « Description », « Catégorie » et « Playbooks ».

- Définissez le seuil souhaité. Cela déclenchera un avertissement lorsque des éléments correspondants seront trouvés. Pour plus d’informations, consultez l’article : Seuils.
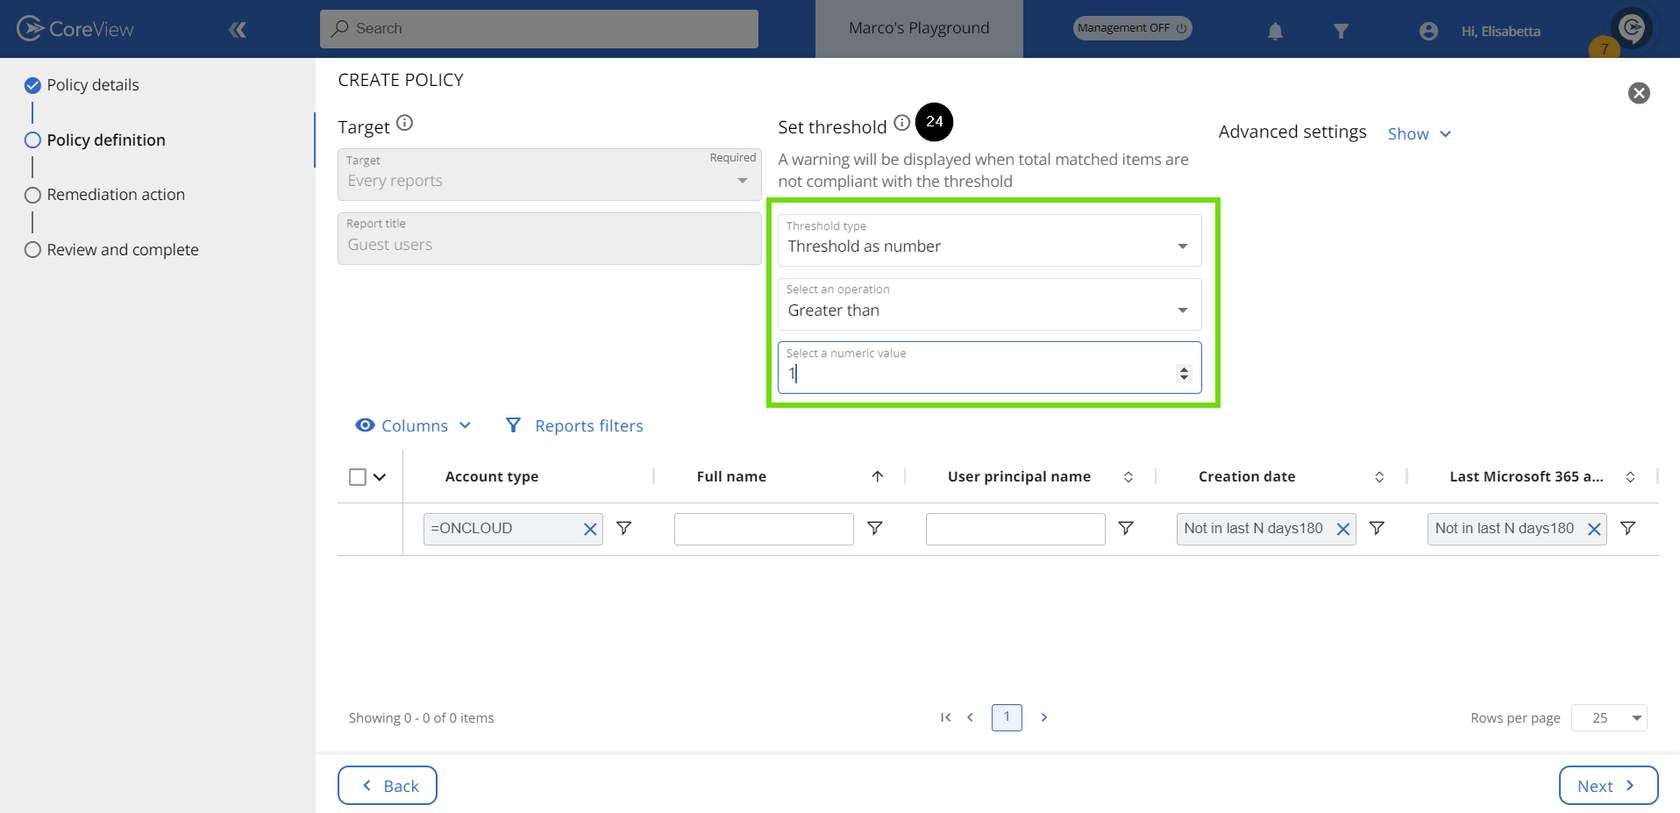
- Sous « Action de remédiation », choisissez « Exécuter le Workflow » comme remédiation et sélectionnez votre Workflow dans le menu déroulant. Pour plus d’informations, consultez l’article : Paramètres et actions de remédiation.
- Sous « Entrée d’exécution de la remédiation », cliquez sur « Automap » pour générer automatiquement l’entrée.
- Dans « Planification », précisez la fréquence à laquelle vous souhaitez exécuter le Workflow.
Lors de la sélection des colonnes du rapport, assurez-vous d’avoir choisi la colonne qui alimentera l’entrée d’exécution du Workflow ; sinon, le bouton Automap ne fonctionnera pas !

- Vérifiez puis « Enregistrez ».
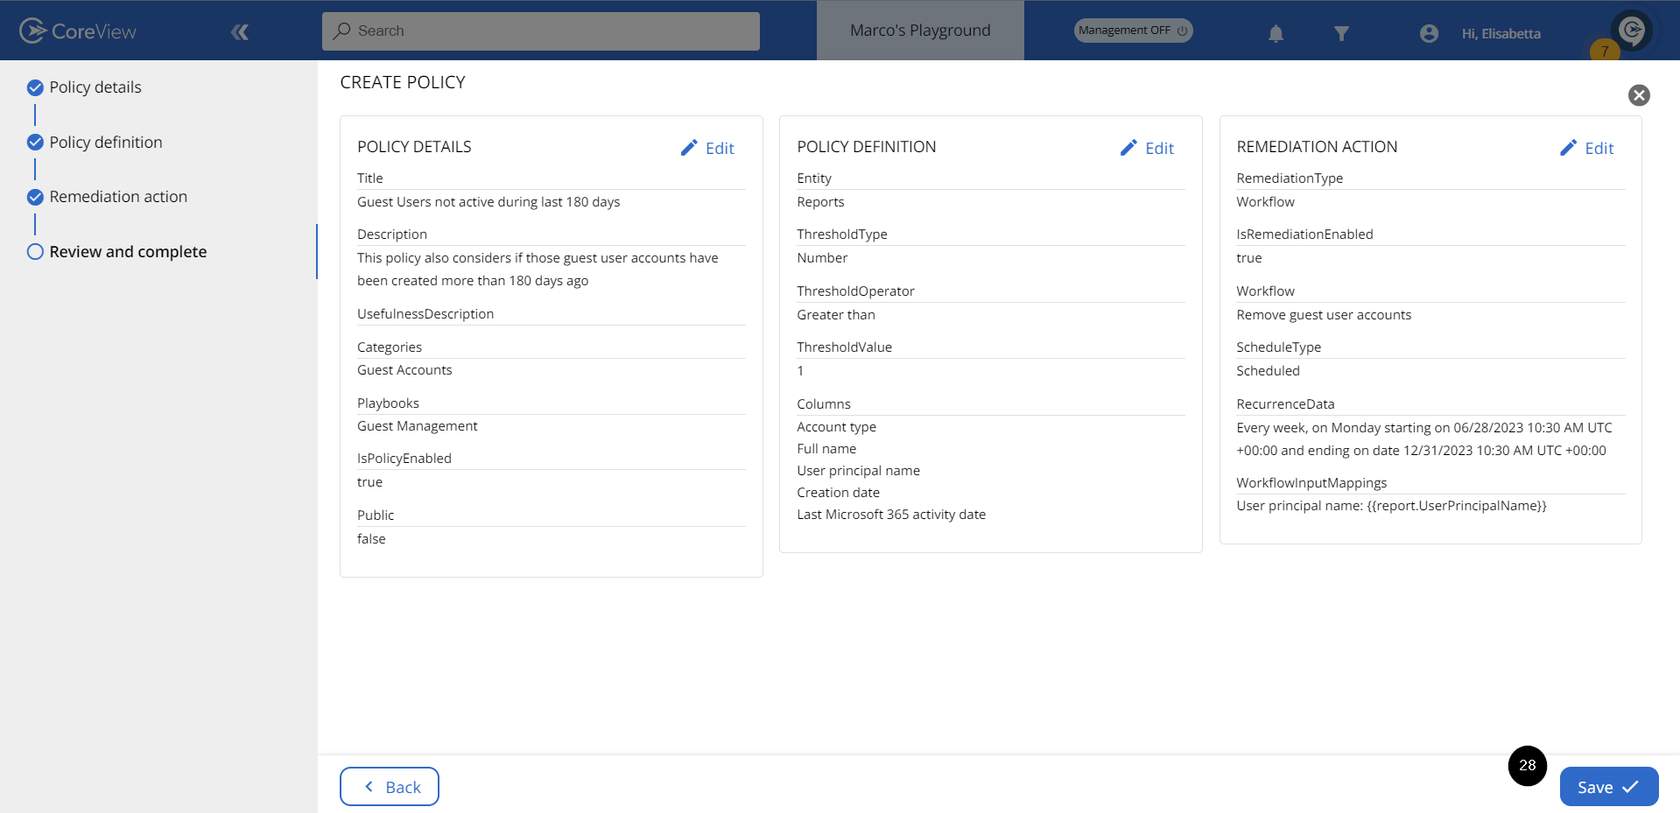
- Sous « PLAYBOOKS », vous devriez voir votre nouveau workflow personnalisé avec remédiation planifiée.

